- Print
- DarkLight
Intro to edit Grave information
Managing the details of a grave on nettgrav.no is a privilege that allows you to honor the memory of your loved ones accurately and respectfully. This guide is designed to assist grave owners and administrators starting with updating or adding information to a grave page.
Navigating to the Grave Page
Finding the Grave: To update grave details, you first need to locate the grave. This can be done directly from your lifepage if you've already established a link with the departed. Alternatively, use the search function to find the grave by name or other identifying details.
Accessing Grave Details: Once on the grave's page, look for the 'About Deceased' tab in the Grave menu. This area contains the essential information about the deceased that you may want to update.
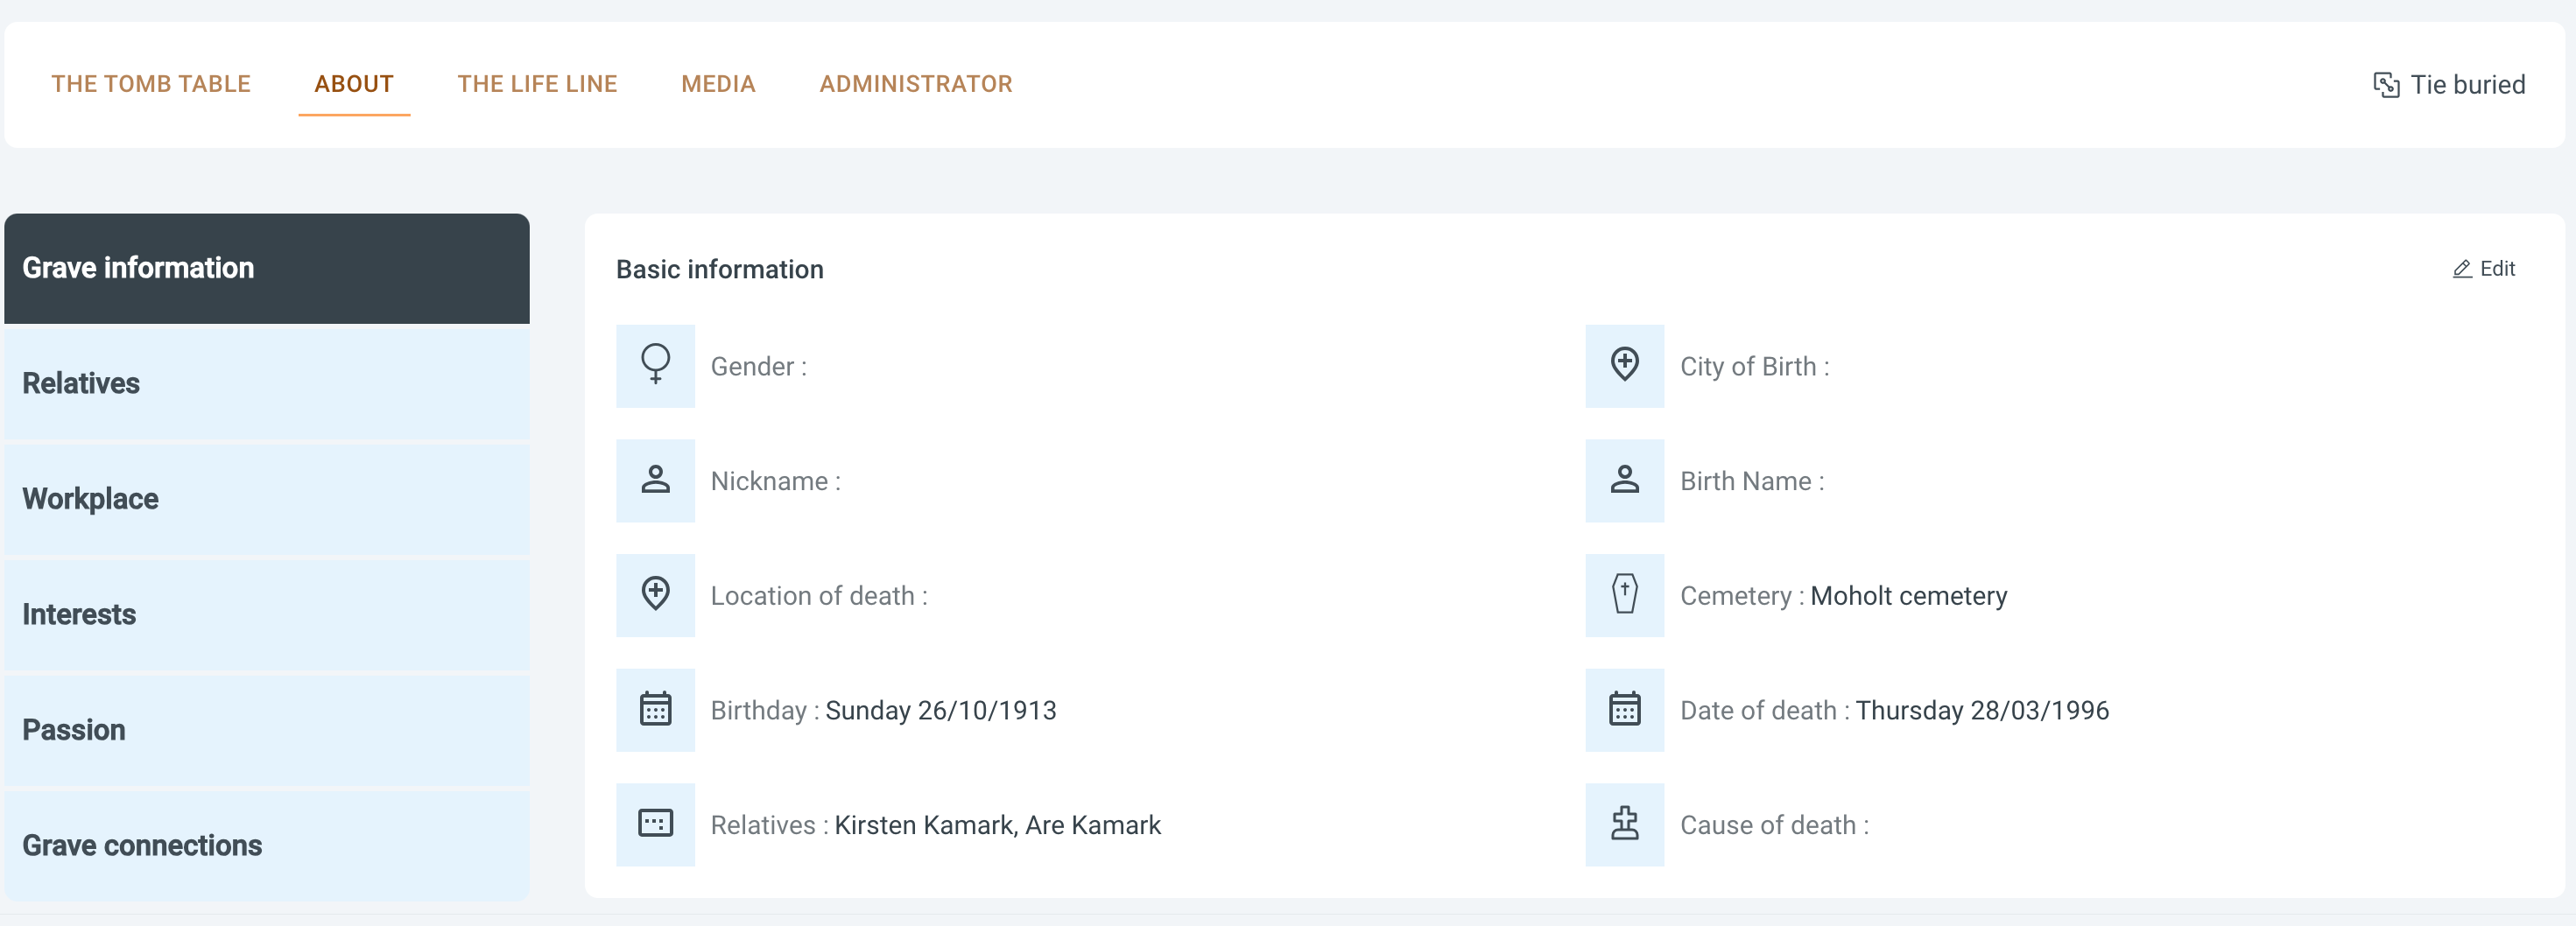
Editing Grave Details
Editing Access: Click the 'Edit' button, symbolized by a pencil icon, to enter the editing mode. Please note that this icon is only visible to users who have been granted guardian or administrator access to the grave page.
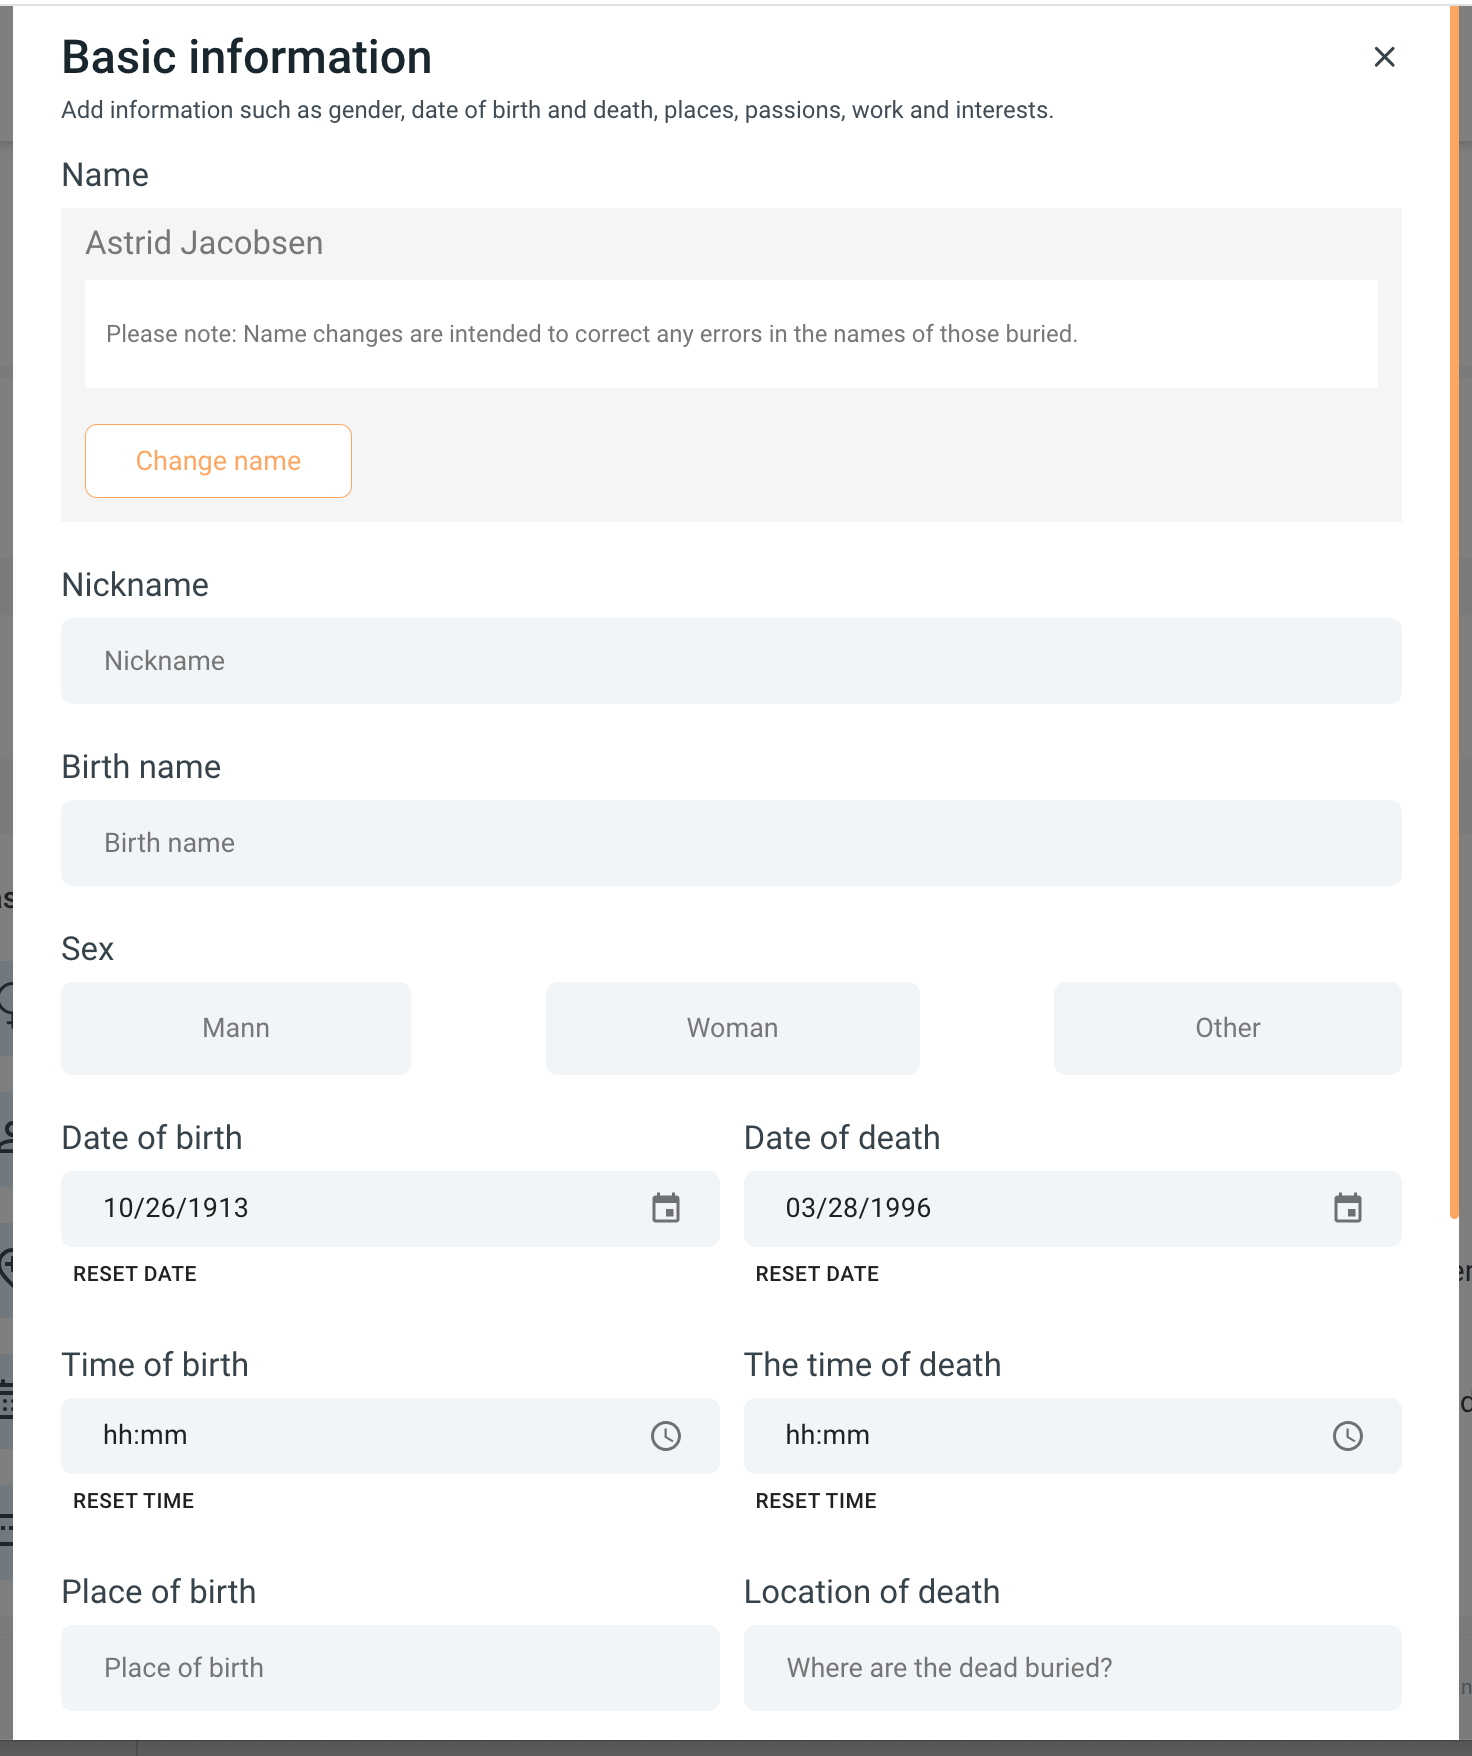
Making Changes: A pop-up will appear, presenting you with various fields that you can add to, remove from, or edit. These fields include the deceased's name, dates of birth and death, and other personal details.
Selecting Details: On the left-hand menu within the pop-up, choose which section of information you wish to update. Options may include 'Relationships,' 'Workplace,' 'Interests,' 'Passions,' 'Grave Connections,' and more.
Saving Updates: After making the desired changes, ensure to save them properly. This will update the grave page with the new details, keeping the memory of the departed accurately represented on nettgrav.no.
Updating Connections: Managing Relationships on a Grave's Page
As a grave owner or administrator on nettgrav.no, you have the unique ability to manage and update the connections that define the network around your loved one's grave. Here's how you can ensure that these relationships are accurately reflected and maintained:
Inviting New Connections: Begin by navigating to the 'Relationships' section of your grave's page. Here you can view existing relationships and extend new invitations. Click on 'Invite' to add someone new.
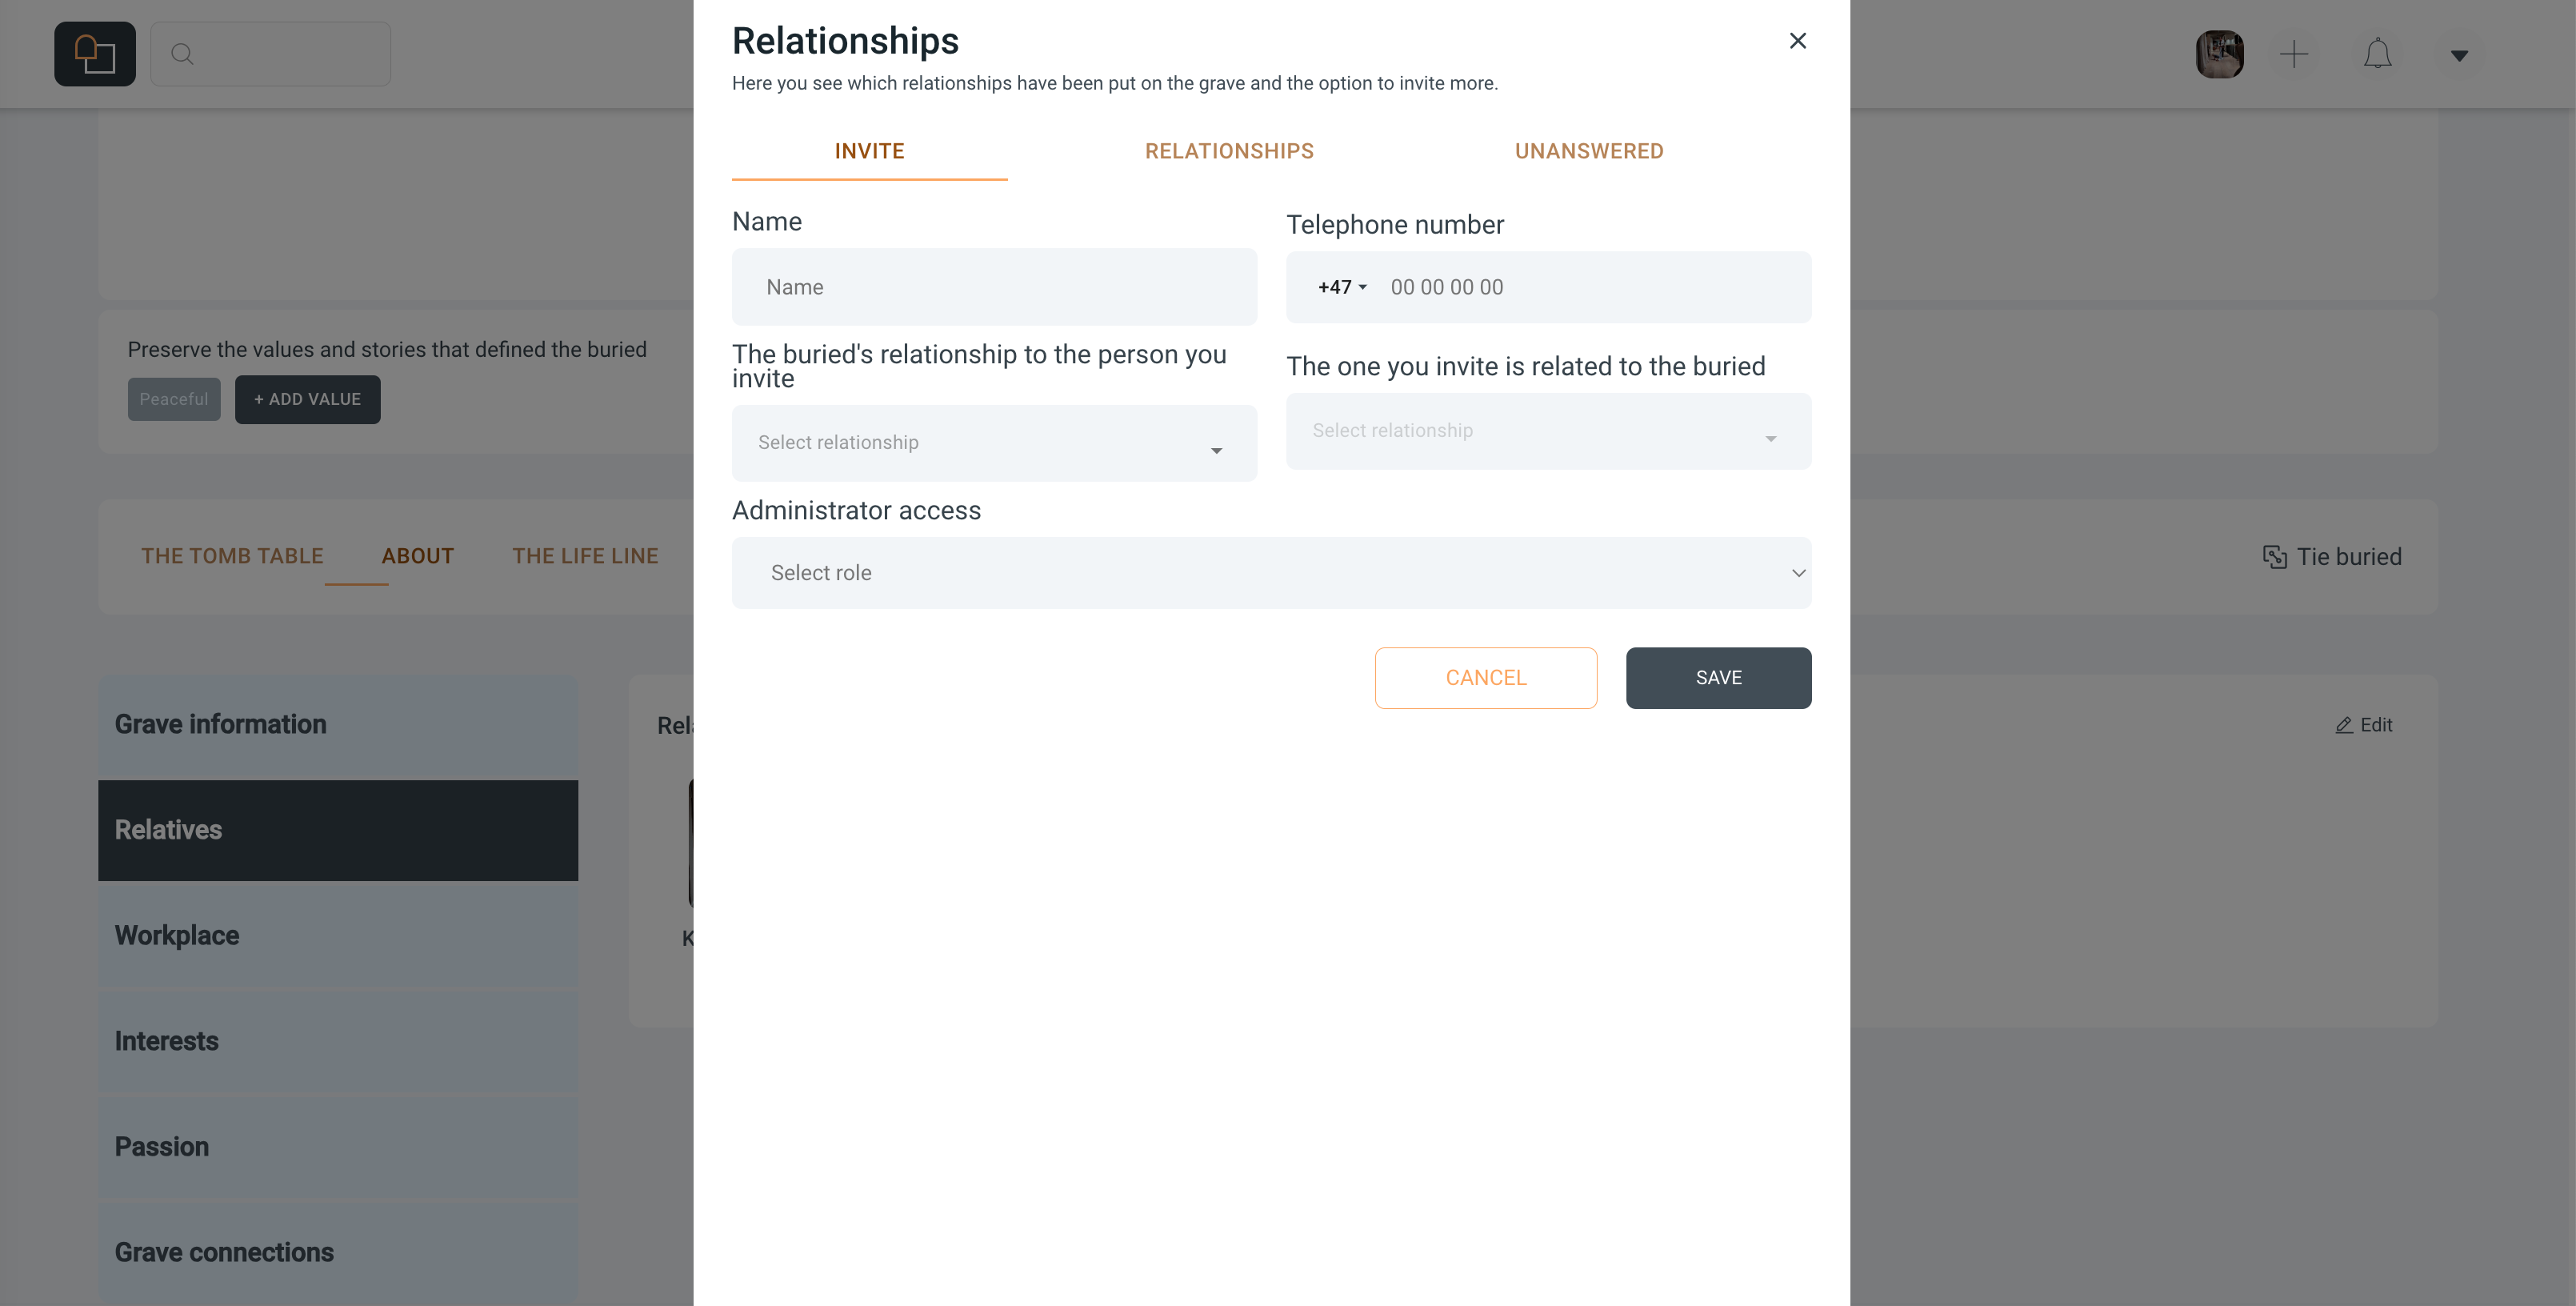
Filling in the Details: Enter the name and phone number of the person you wish to invite. Then, select their relationship to the deceased from the drop-down menu. It’s important to also define how the invited individual relates back to the deceased, ensuring clarity in connection.
Granting Administrative Access: If you wish to give the invitee administrative privileges, you can do so by selecting the appropriate role for them. Administrators can make changes to the grave's page and approve incoming invitations.
Reviewing Invitations: After sending an invitation, it will appear under the 'Unanswered' tab. You can monitor which invitations have been accepted and which are still pending.
Editing Current Relationships: Existing relationships can be edited by searching for the relative's name and clicking the 'Edit' option. This is where you can adjust the details of how they're related to the deceased or change their administrative status.
Maintaining an Organized Network: By keeping the relationship information up-to-date, you create a respectful and accurate representation of the deceased's social and family network, allowing for a community that truly reflects their life and connections.
Remember, each connection on nettgrav.no contributes to the rich tapestry of memories and honors the legacy of your loved one. By diligently managing these relationships, you ensure that the memory of the deceased is preserved with integrity and love.
Editing Existing Memberships on a Grave's Page
As the steward of a grave's page, keeping the members' information up-to-date is as important as managing relationships. Here's a step-by-step guide on how to edit existing memberships:
Accessing Member Information: To view or edit the memberships, go to the 'Relationships' tab on your grave's page. You'll see a list of all individuals currently associated with the grave.
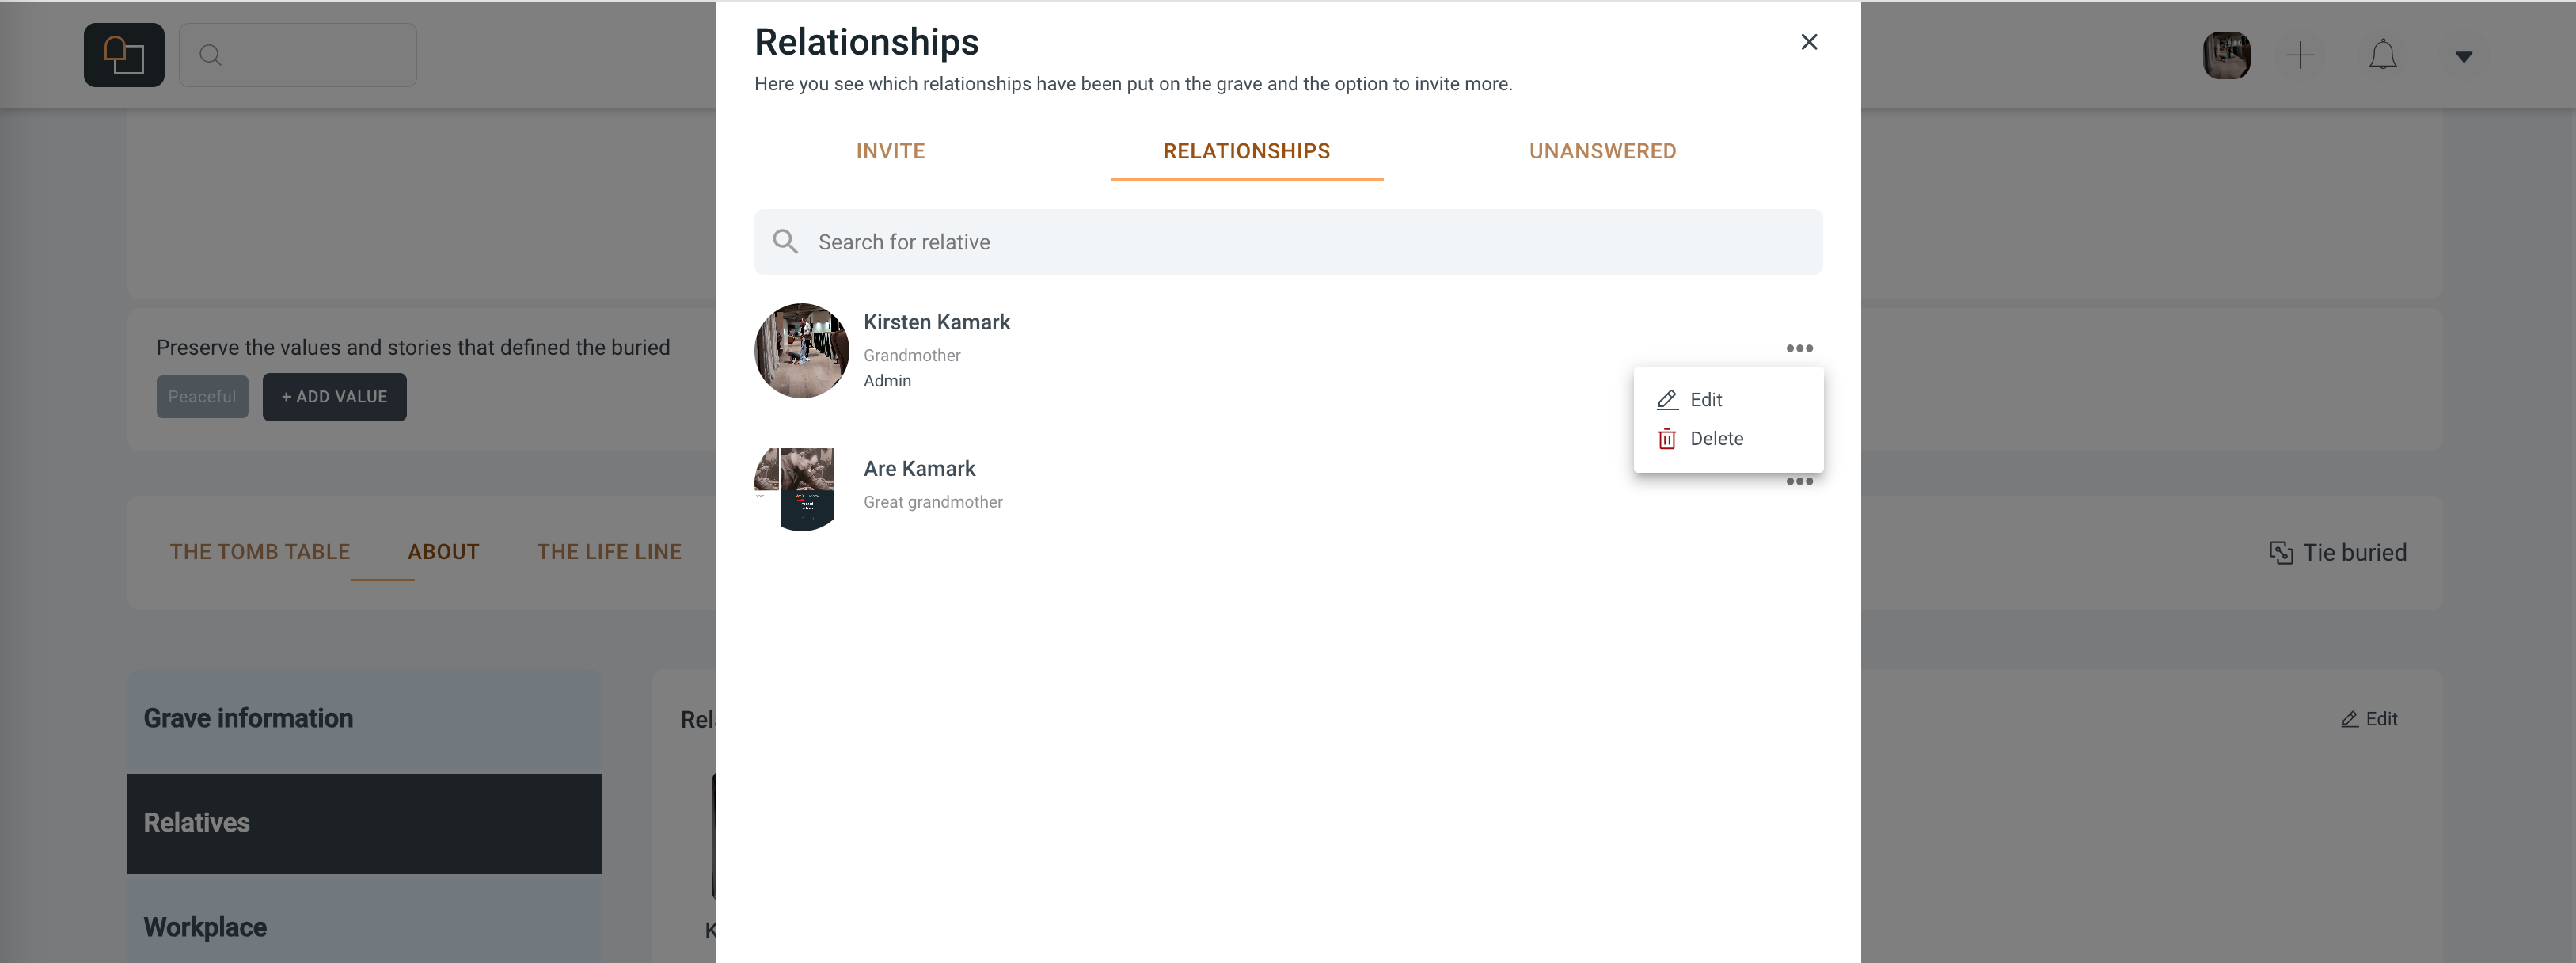
Editing Member Details: Find the member whose details you wish to edit. Click on the 'Edit' button, which might be symbolized by a pencil icon, to update their information.
Updating Roles and Permissions: In the editing window, you can change the member's role (such as from a viewer to an administrator) and adjust their permissions. This determines what actions they can perform on the grave's page.
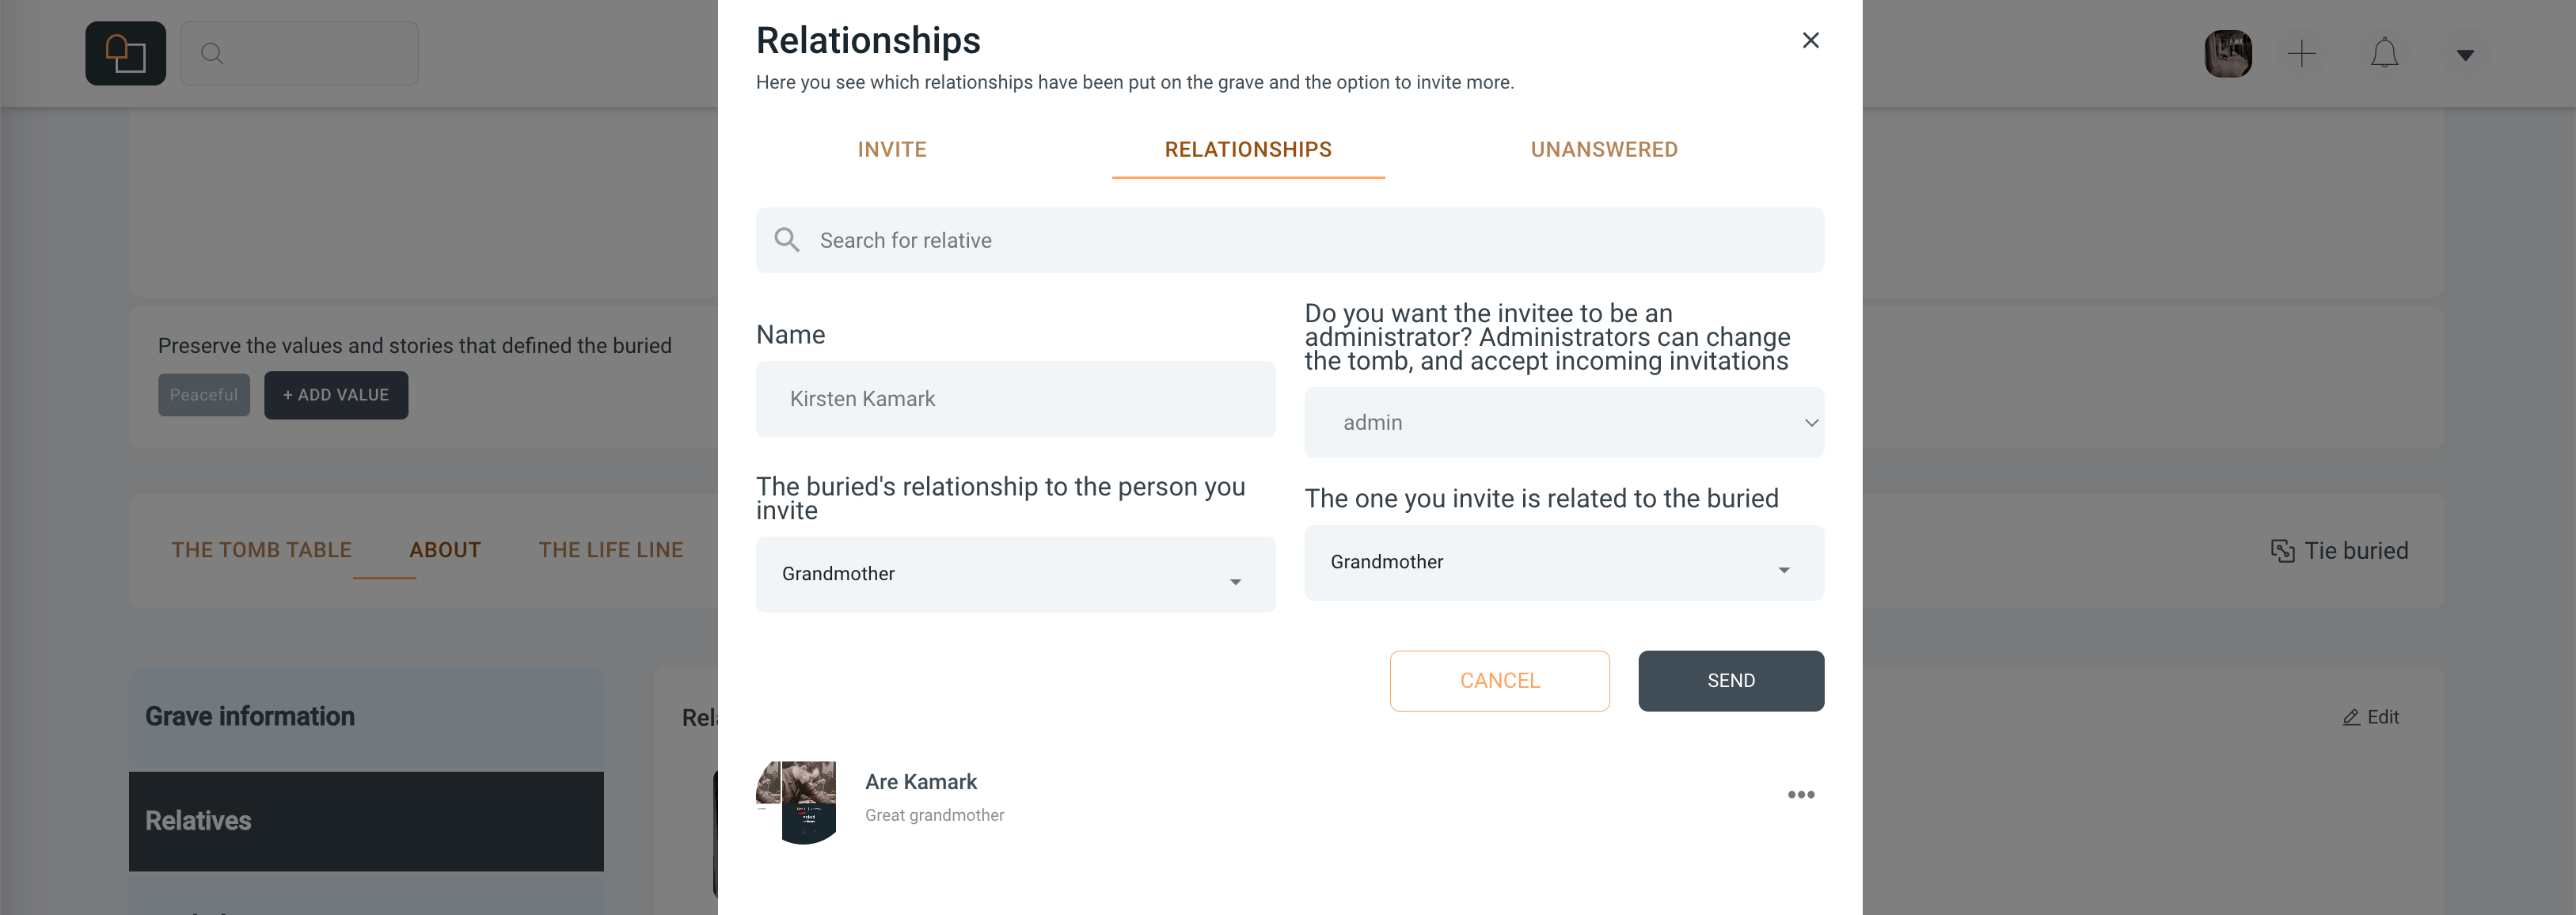
Confirming Changes: Once you have made the necessary adjustments, confirm the changes. The updated member roles will take effect immediately, empowering those you’ve chosen with the ability to contribute to the grave's page management.
Organizing Member List: Keep the members list organized by removing inactive members or those who no longer wish to be connected to the grave's page. This ensures an active and engaged community around your loved one's digital memorial.
By regularly updating and managing memberships, you maintain a living, dynamic space that honors the memory of the deceased and fosters an engaged support network of family and friends.
Managing Unanswered Invitations on a Grave's Page
When you extend an invitation to someone to join a grave's page, their response is crucial to formalizing their relationship with the memorial. Here's how you can manage invitations that haven't been answered yet:
Locating Unanswered Invitations: On your grave's page, you will find a 'Relationships' section. Navigate to the 'UNANSWERED' tab to view all the invitations that are pending a response.
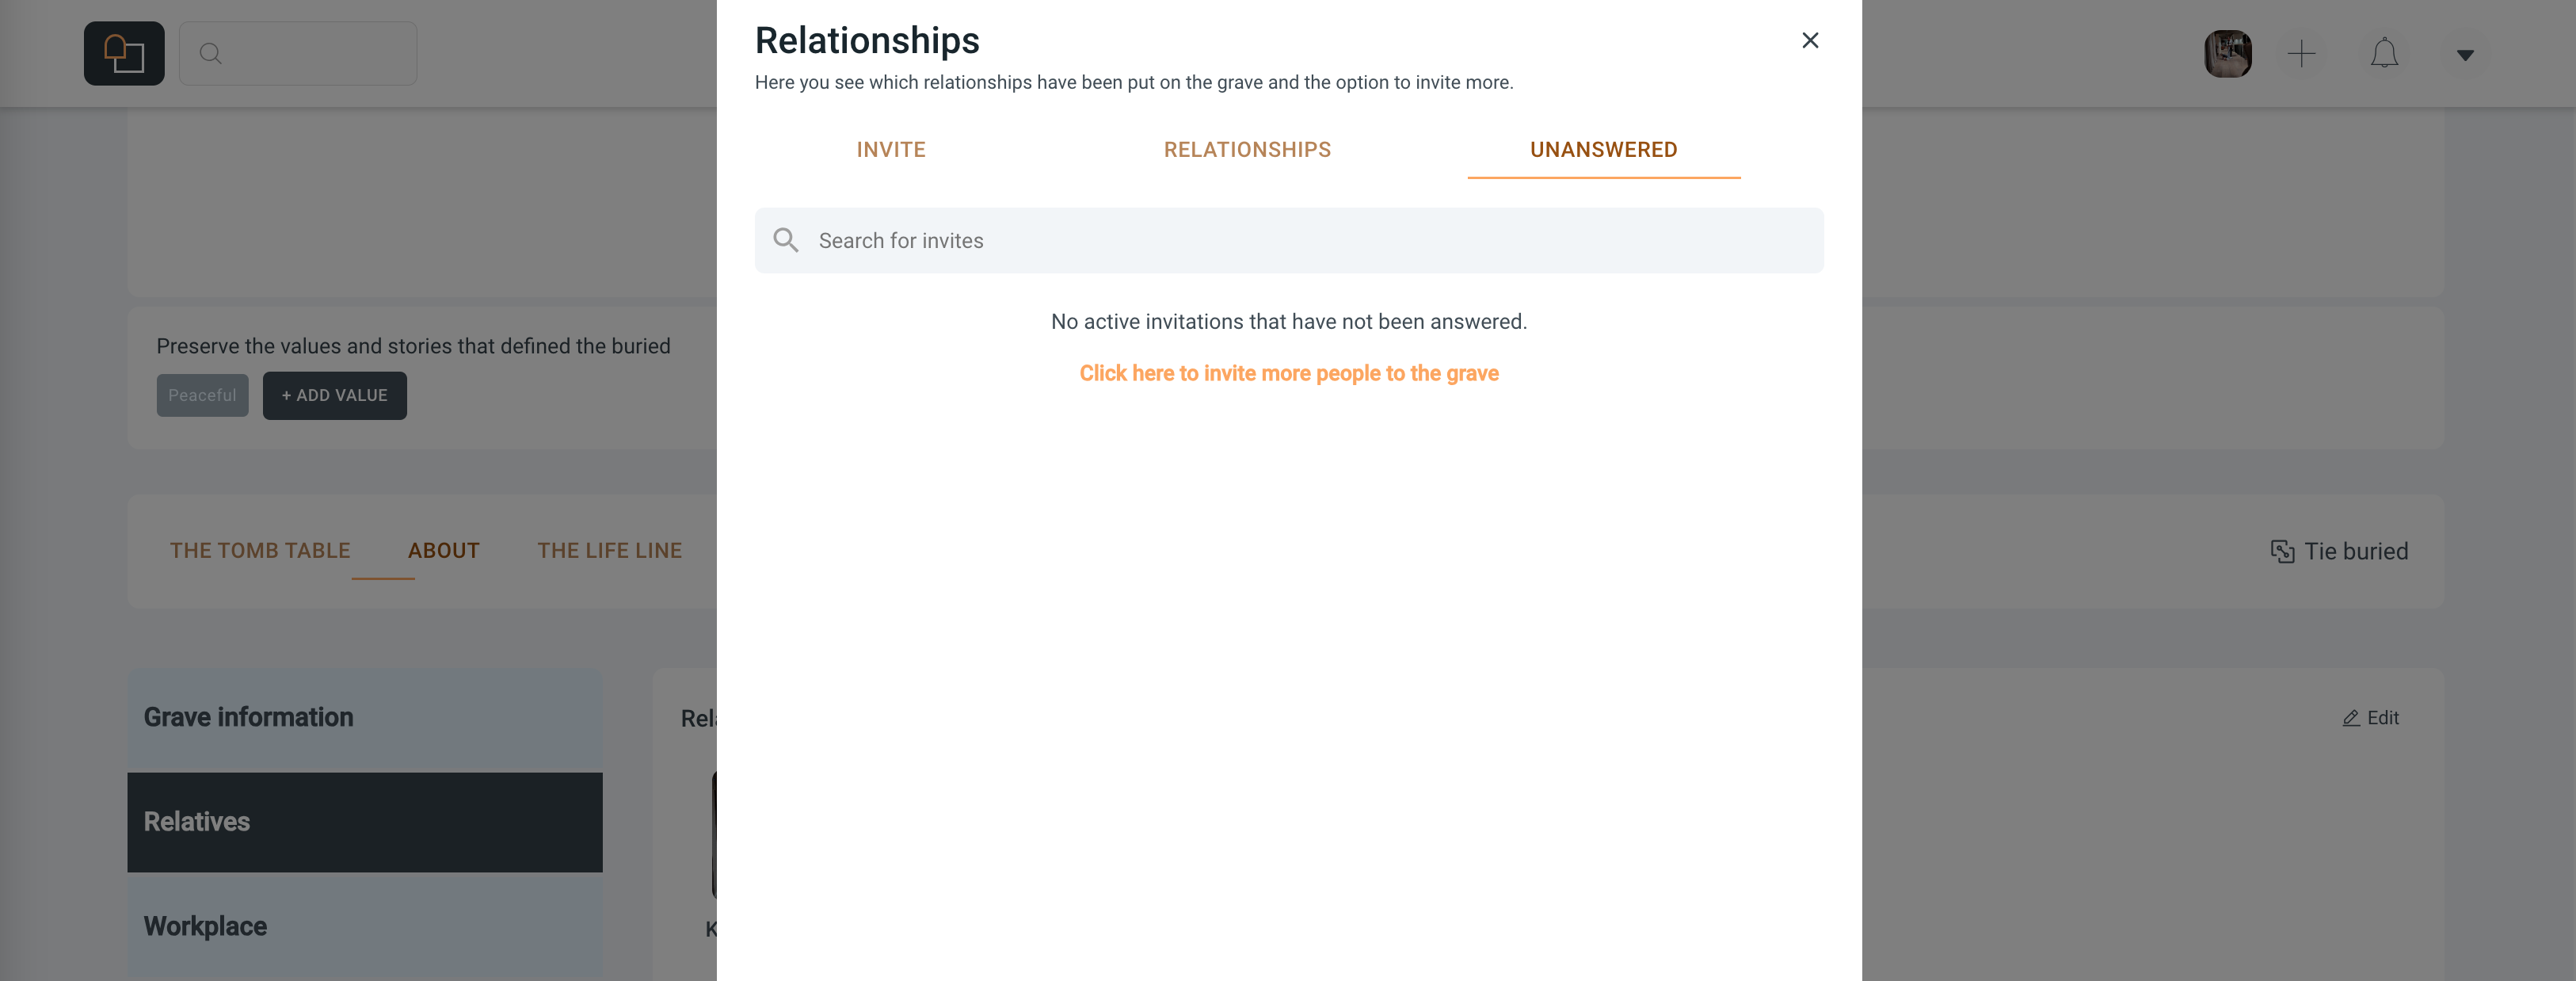
Understanding Invitation Status: Invitations listed under this tab have been sent out but have not yet been accepted or declined. This section allows you to keep track of who is still considering joining the page.
Sending Reminders: If an invitation remains unanswered for an extended period, you might consider sending a reminder to the invitee. This can prompt them to respond and ensure they haven't overlooked the invitation.
Inviting More People: Should you need to invite additional friends or family members, you can easily do so from this section. Simply click on the 'Click here to invite more people to the grave' link to send out new invitations.
Transition to Relationship List: Once an invitee responds to the invitation, their status will change. If they accept, they'll move to the 'RELATIONSHIPS' list, where you can then assign them roles and manage their interaction with the grave's page.
Canceling Invitations: In case you need to retract an invitation, you can do so by selecting the invitation in question and choosing the cancel option. This removes the invitation and prevents any further action from the invitee.
By keeping an eye on unanswered invitations and following up as needed, you can ensure that all who are meant to be part of the grave have the opportunity to contribute.
Adding Workplaces
When commemorating a loved one, preserving their work journey can be a profound way to keep their identity intact. Nettgrav.no provides you with the tools to enshrine the workplaces that were significant in life. Here's how you can add this important aspect to their grave:
Navigate to the Grave: Go to your dashboard or use the search function to find the grave you manage.
Access the 'Workplace' Tab: In the grave's information page, click on the 'Workplace' section to start adding details about their professional life.
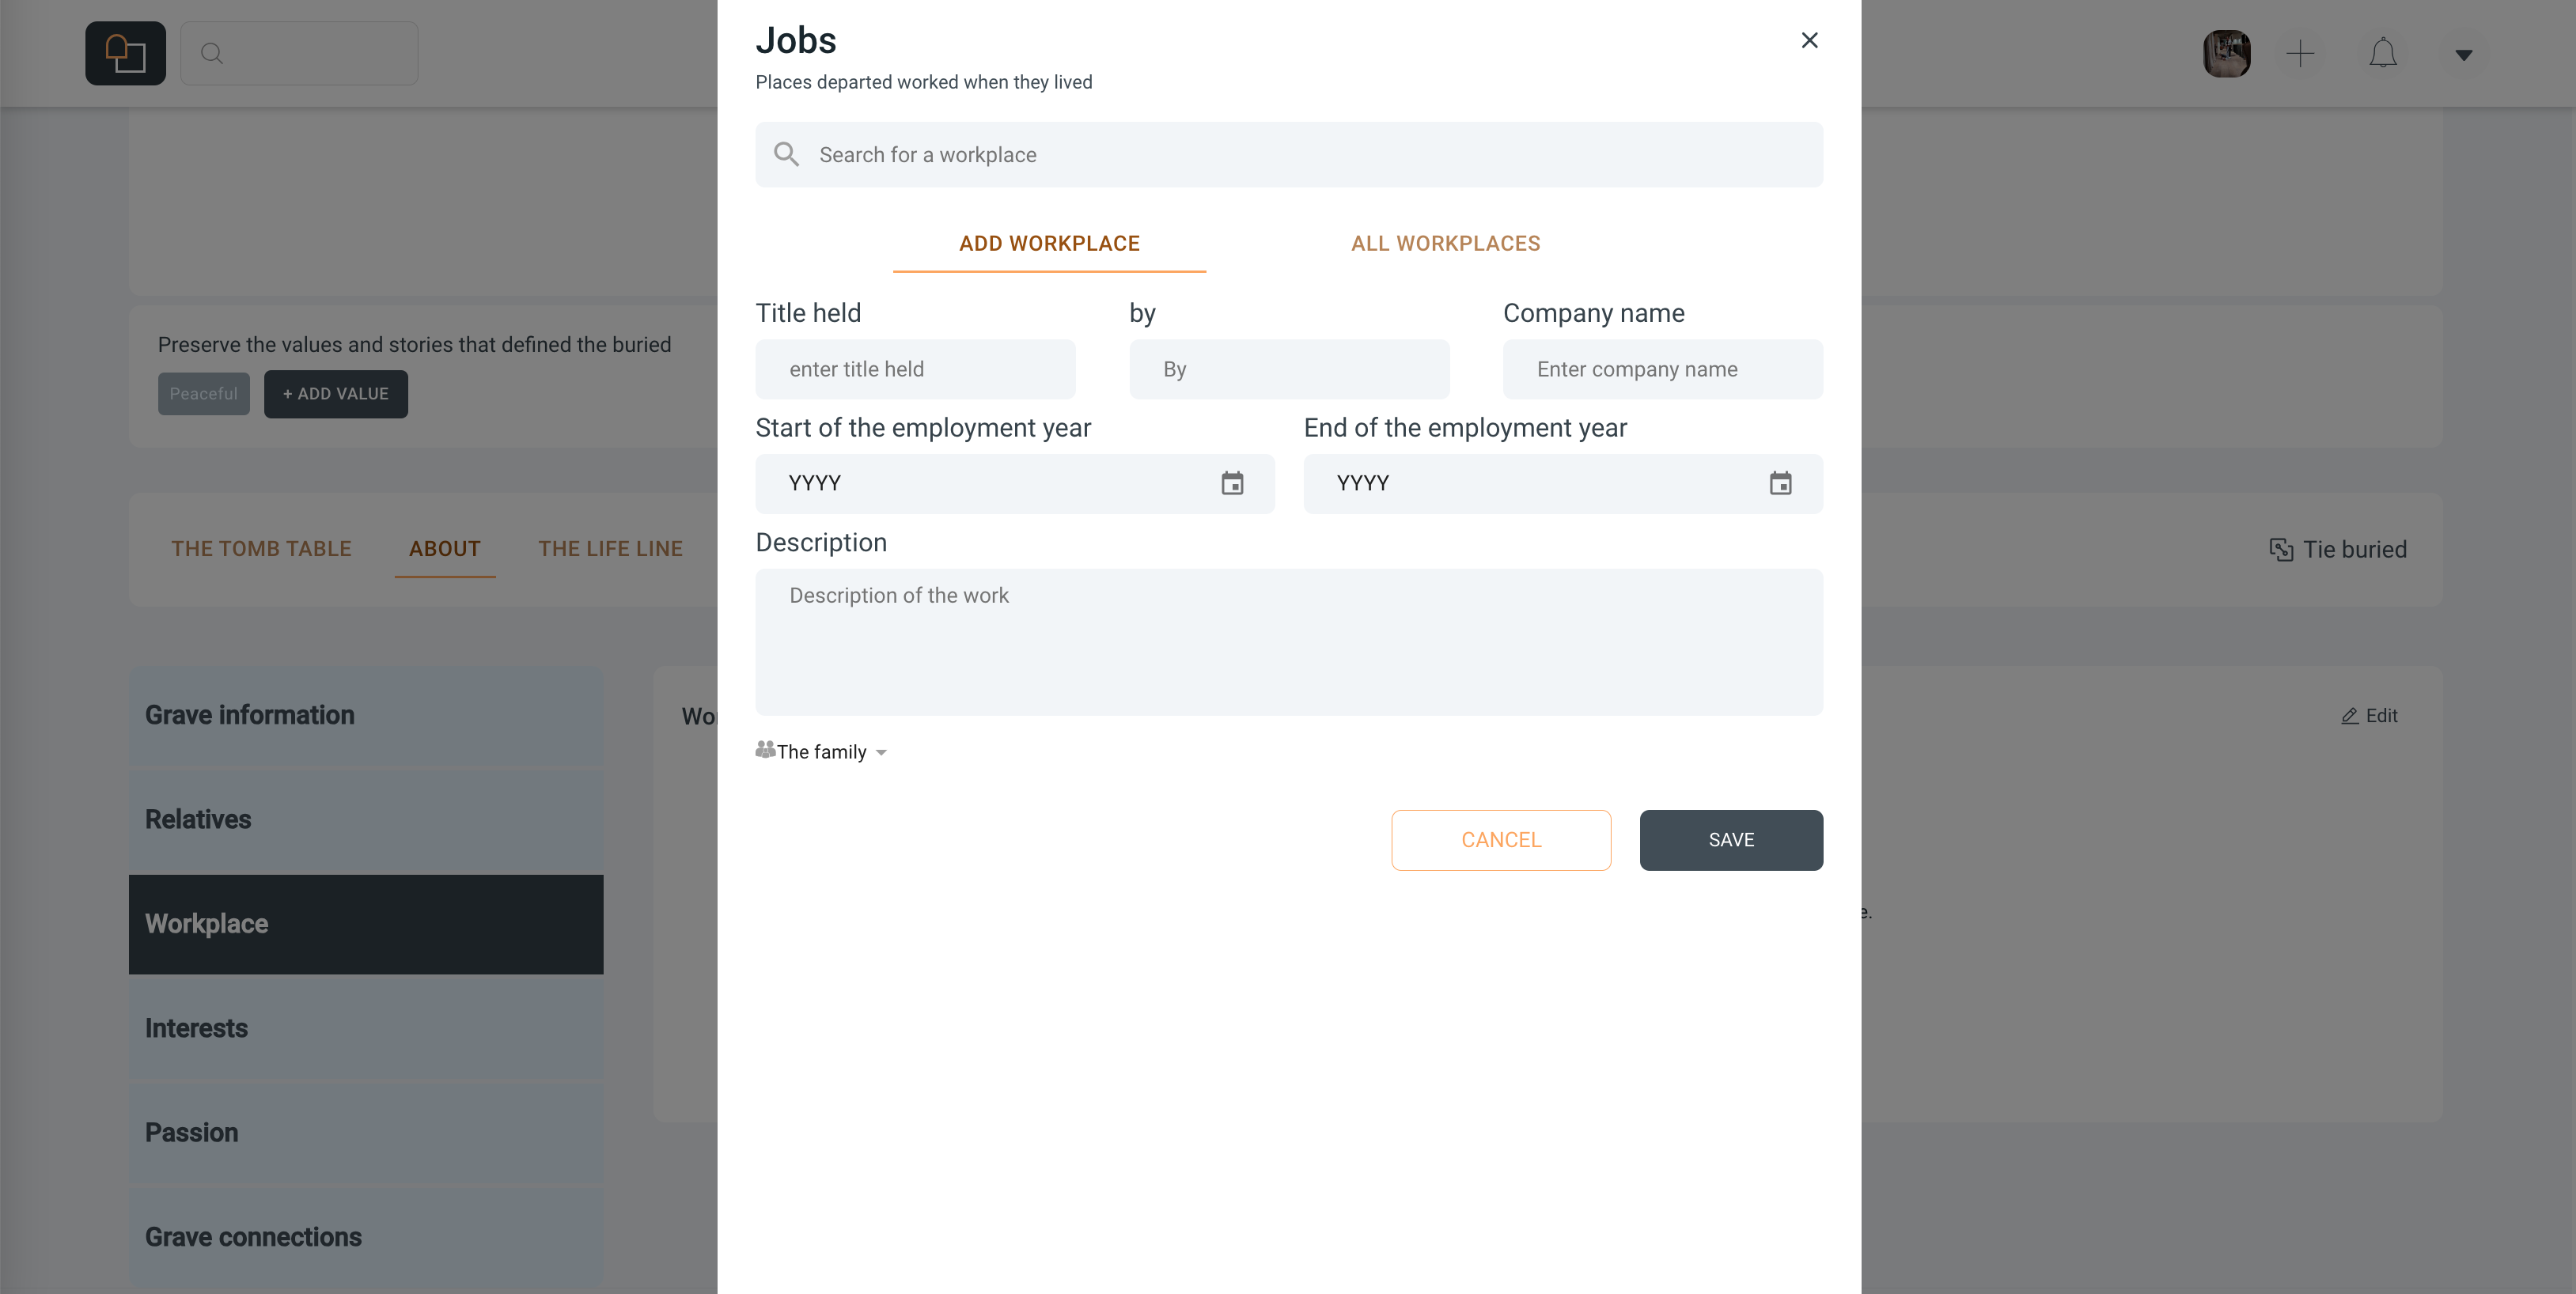
Add a Workplace: Click on the 'Add Workplace' button. A form will appear where you can enter the following details:
Title held: Enter the position or job title held by the deceased.
Company Name: Specify the name of the company or organization where they worked.
Start and End of Employment Year: Provide the time frame of their employment to help others understand the period of their professional endeavors.
Description: Share a brief narrative or specific anecdotes about their role, achievements, or any notable work-related stories.
Save the Information: After entering all the details, click the 'Save' button. The workplace information will now be a part of the grave's virtual memorial, viewable by all who visit.
By curating workplace details, you contribute to a fuller picture of the life of the departed.
Enriching the Grave with Personal Interests
The essence of a person's life story often includes the hobbies, passions, and interests that brought them joy and fulfillment. Nettgrav.no enables you to illuminate the unique facets of your loved one’s personality by adding their interests to their grave. Follow these steps to add the interests that colored their life:
Access the Grave: Locate the digital grave through your dashboard or the search function.
Open the 'Interests' Section: In the grave details, click on the 'Interests' tab to start personalizing this aspect of their memory.
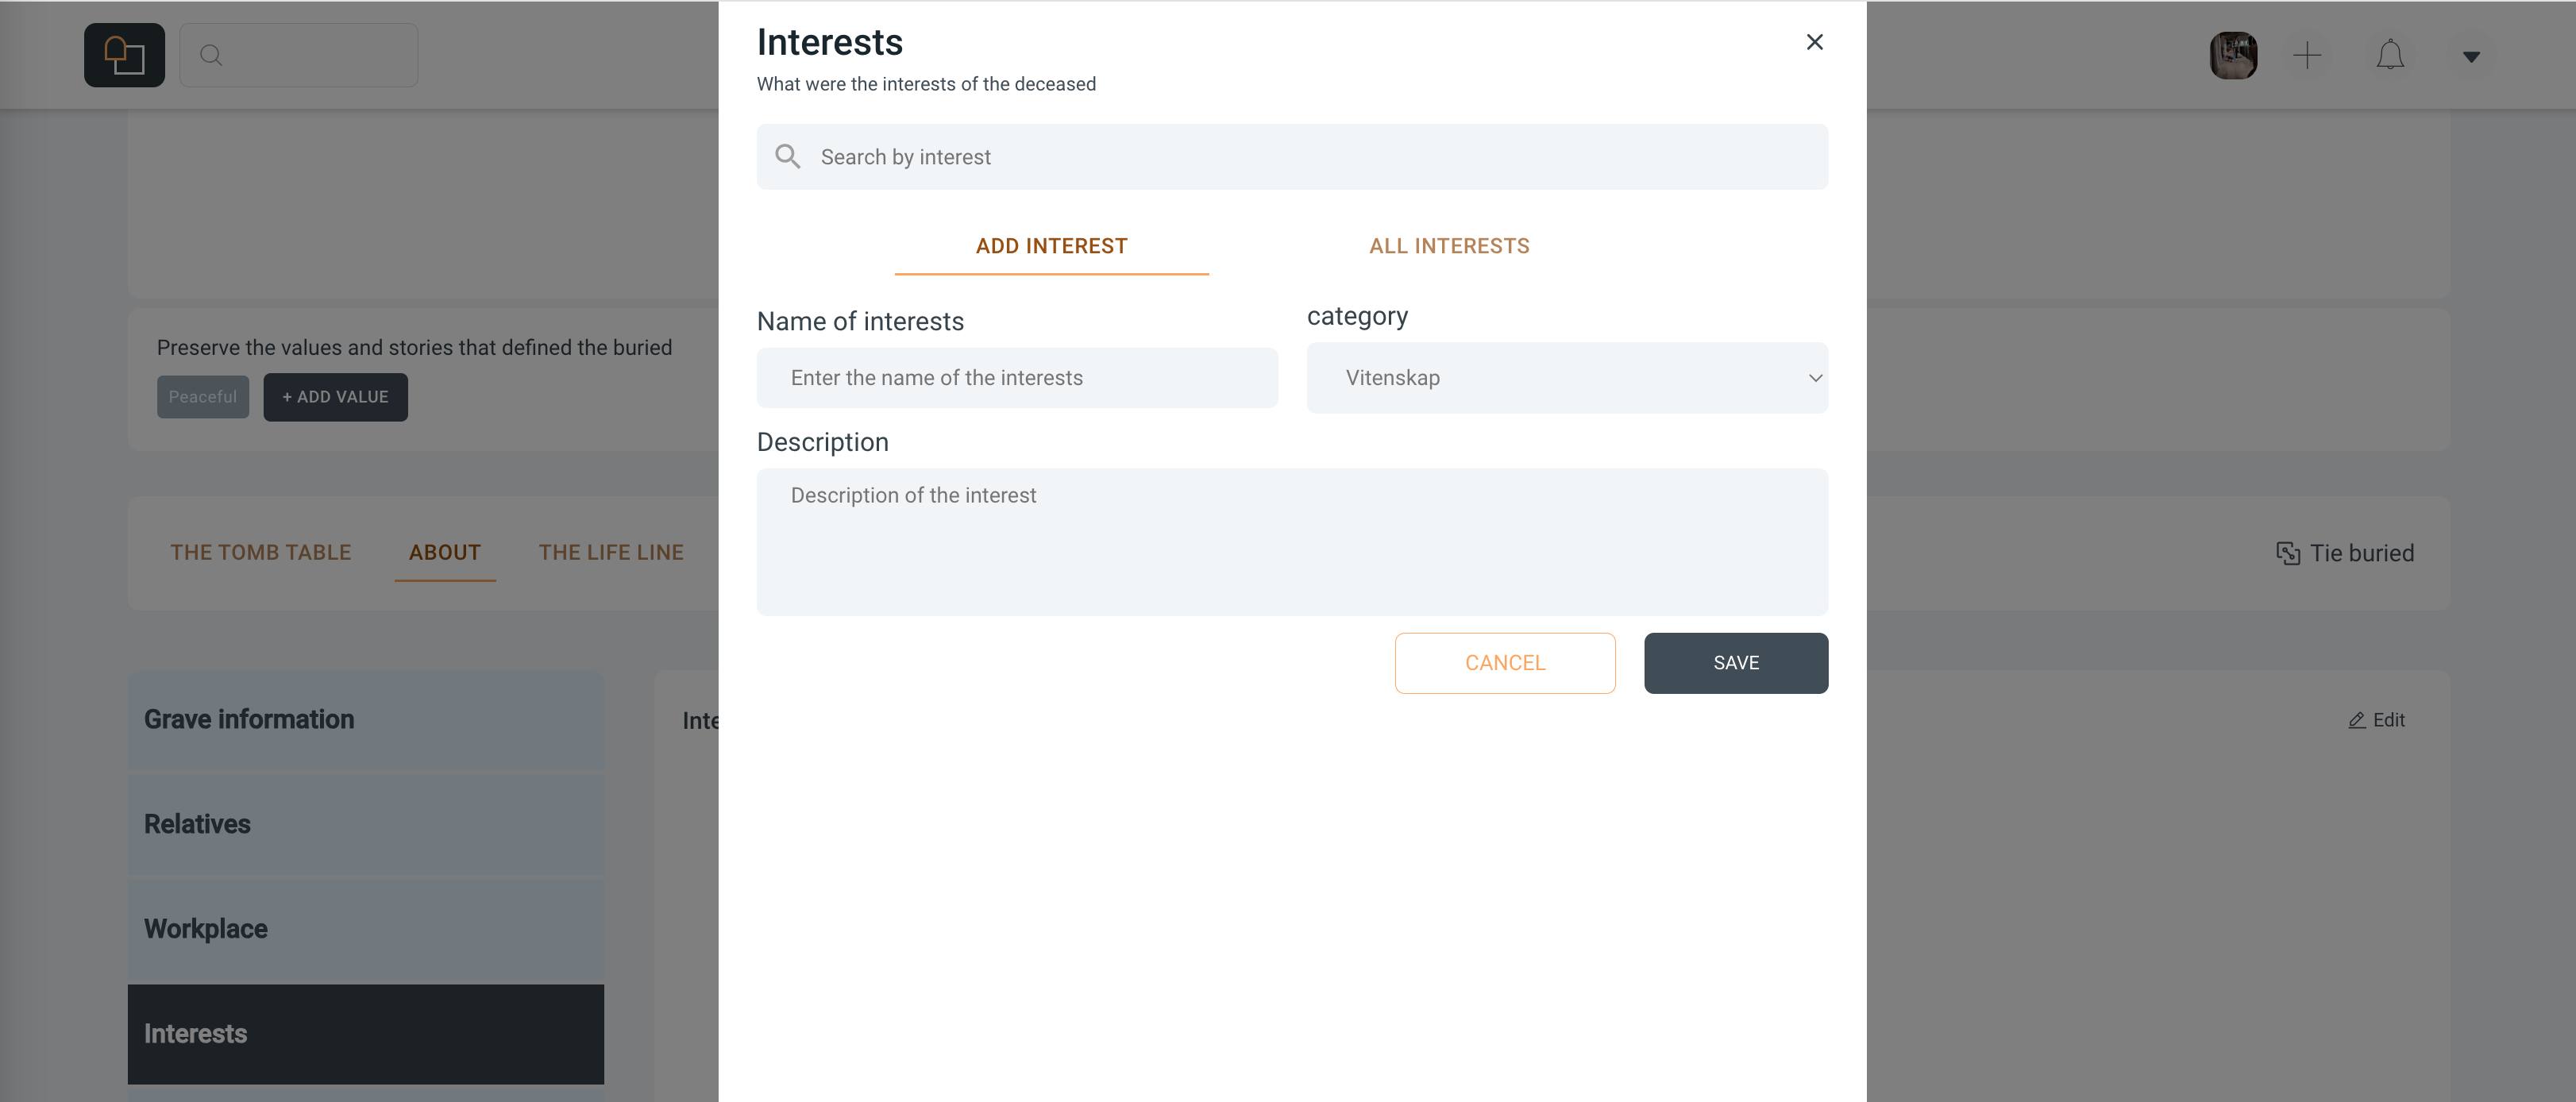
Adding an Interest: Select the 'Add Interest' option to open the entry form where you can include:
Name of Interest: Input the activity or subject that fascinated the deceased.
Category: Choose a category that best describes the interest, which helps visitors understand the nature of the hobby or passion.
Description: Offer details or special stories about their interest, perhaps highlighting significant achievements or moments related to it.
Save the Memory: Click 'Save' after filling out the form to add this new dimension to the grave. The interests you add will help paint a more comprehensive portrait of the deceased for all who knew them, and provide context for memories shared by friends and family.
By documenting the interests of your loved one, you provide a window into their life’s pleasures and pursuits, preserving the fullness of their personality and the joy they derived from their passions.
Capturing the Heart: Adding Passions to the Digital Memorial
Each person’s life is fueled by passions that ignite their spirit and drive their days. Documenting these deep-seated enthusiasms on nettgrav.no can offer solace to loved ones by highlighting the intense devotions that guided the deceased. Here’s how to encapsulate these significant pursuits:
Open the Grave Details: Find your loved one’s grave either from your lifepage or through the search function.
Locate the 'Passions' Tab: Within the grave details, seek out and click on the 'Passions' section to start adding the fervors of their life.
Enter the Passions: Click on the 'Add Passion' to bring up the input area where you can:
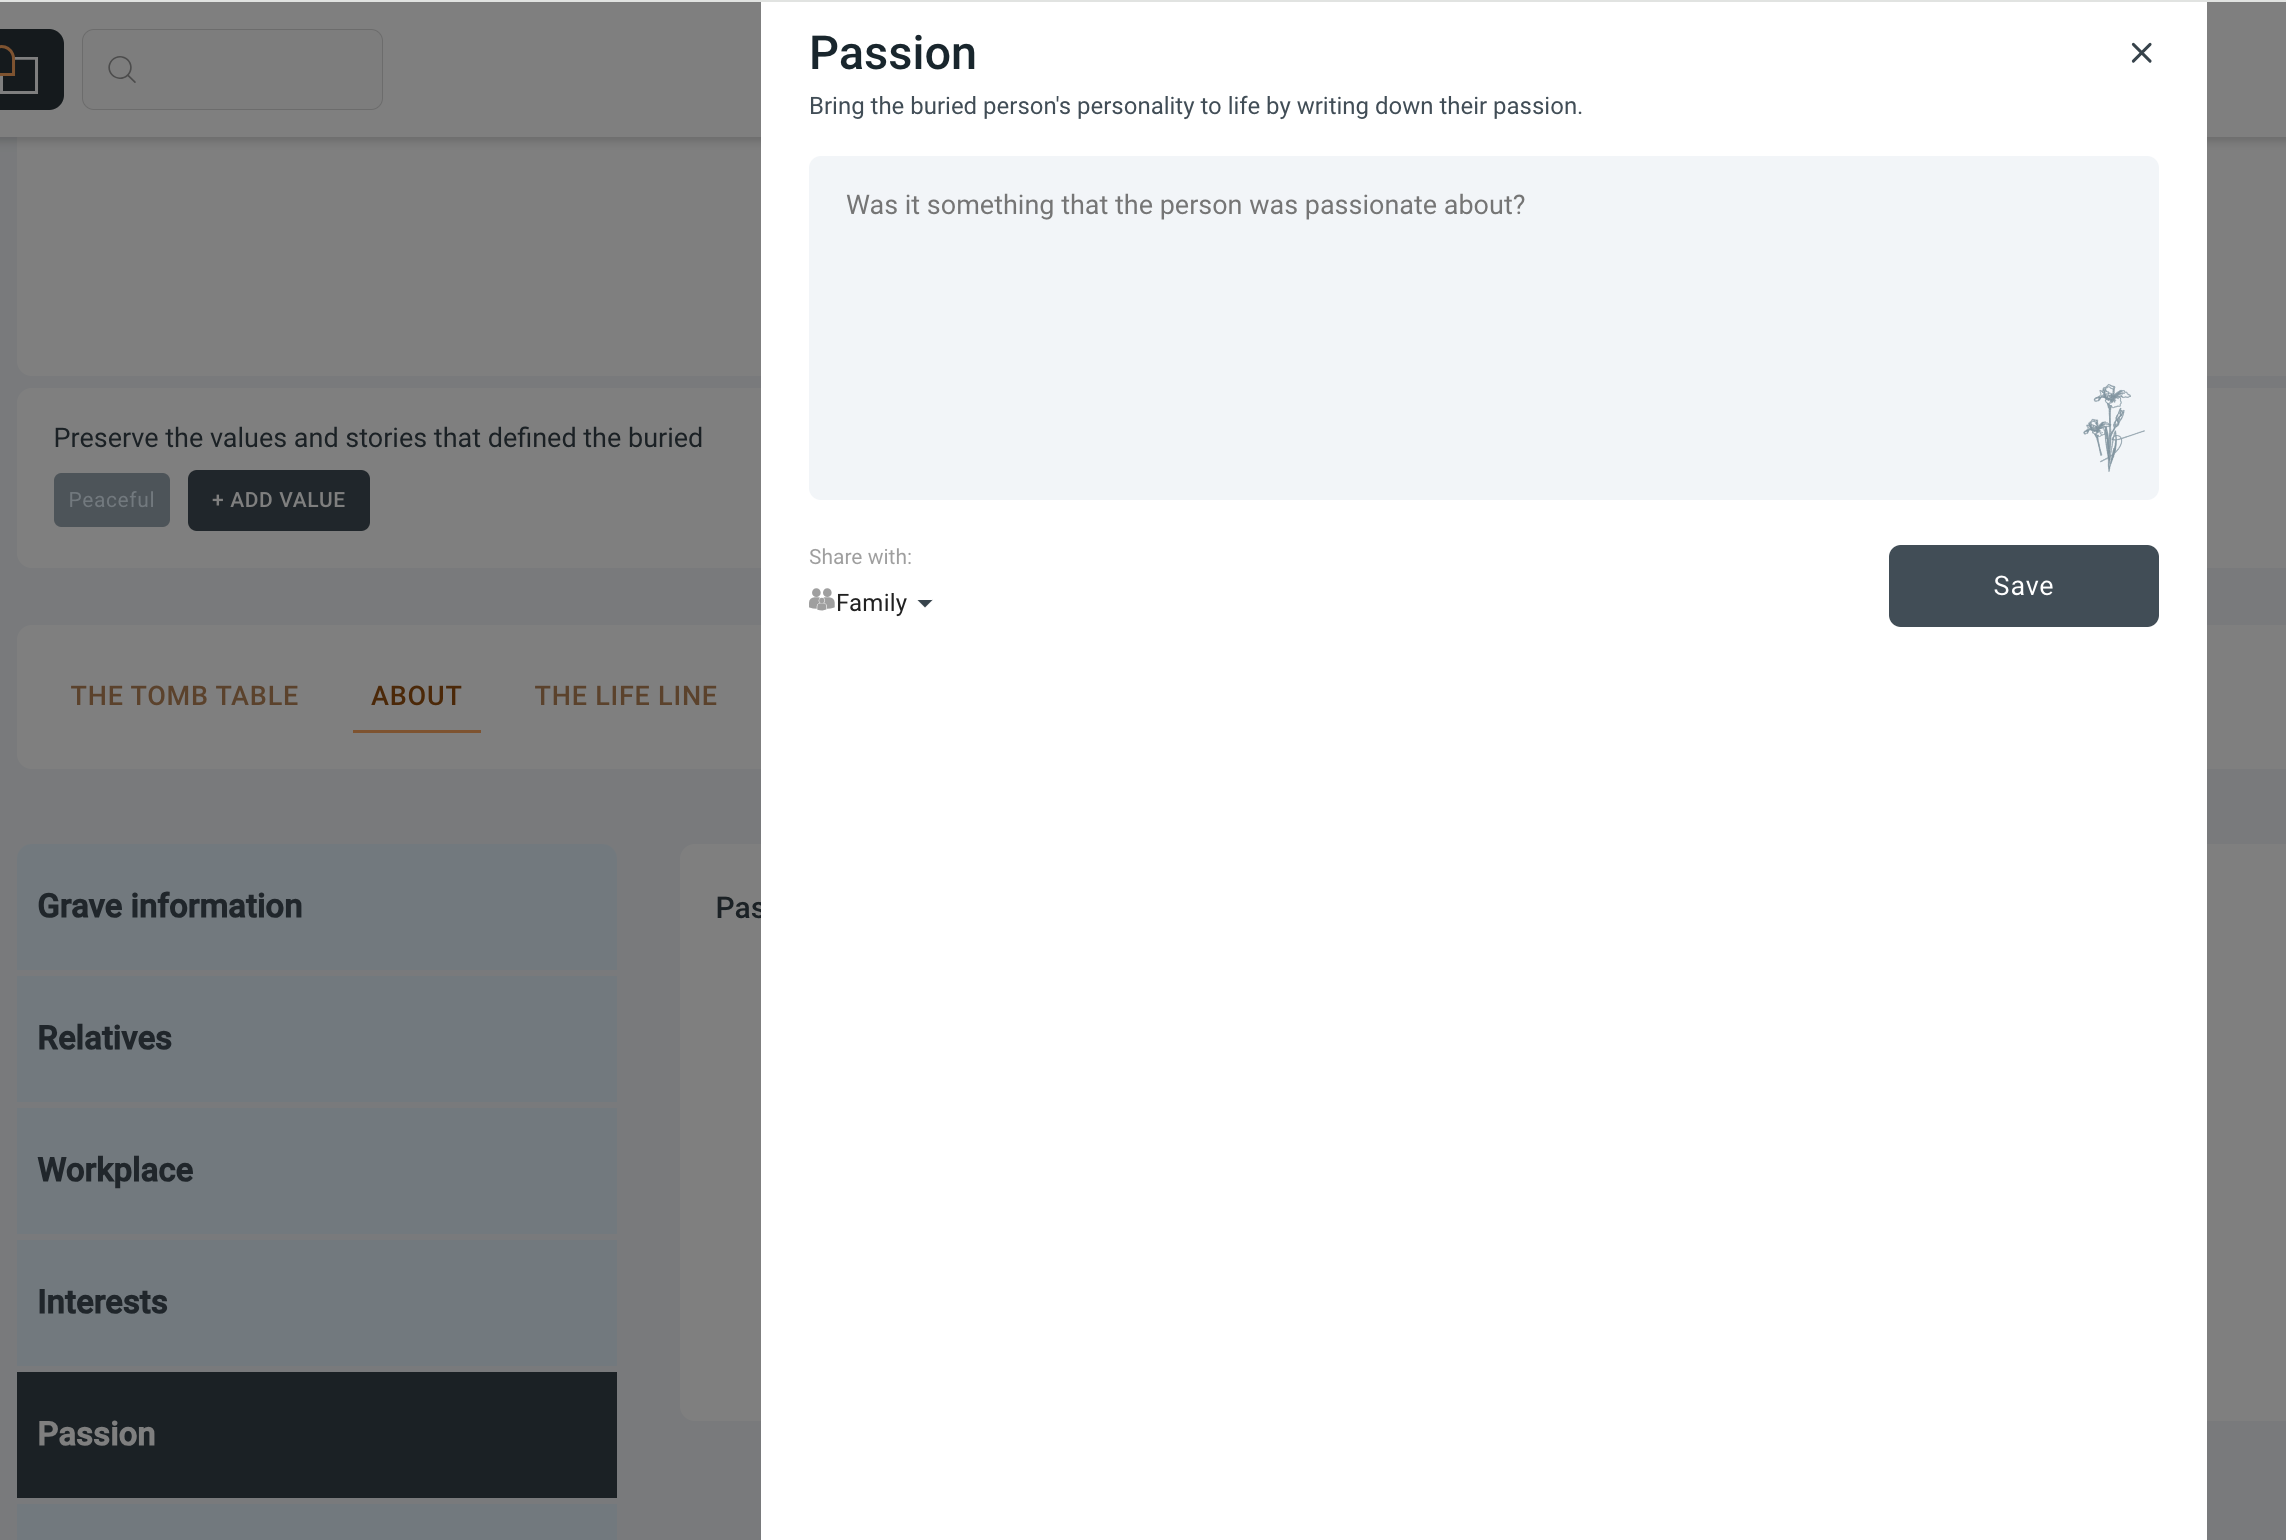
Describe the Passion: What was the deceased deeply passionate about? Reflect on what drove their excitement, what pursuits they carved out time for, or what interests they spoke about with sparkling eyes.
Sharing Option: Decide if you want to share this information with the family or keep it private for now.
Save and Share: After entering the details, select 'Save' to update the memorial. This passion will then be part of the intricate story of who they were, shared with those who visit the memorial.
Passions often represent the essence of a person, and by adding this to their grave, you allow for a renewed focus of what truly moved them. It’s a profound way to remember and honor their vigor for life.
Linking Graves: A Step-by-Step Guide
Creating connections between departed on Nettgrav.no is a way to visualize the relationships that existed between individuals in life. Linking graves can help families and friends in the collective remembrance and in maintaining the legacies of the deceased.
Here’s how to link graves within the Nettgrav.no portal:Locate the Grave: Navigate to the grave you wish to link others to. This can be done through the search function or by visiting your Lifepage if you have already set a relationship with the deceased.
Access Grave Connections: On the grave’s page, look for the section labeled 'Grave Connections' or a similar term used on the site.
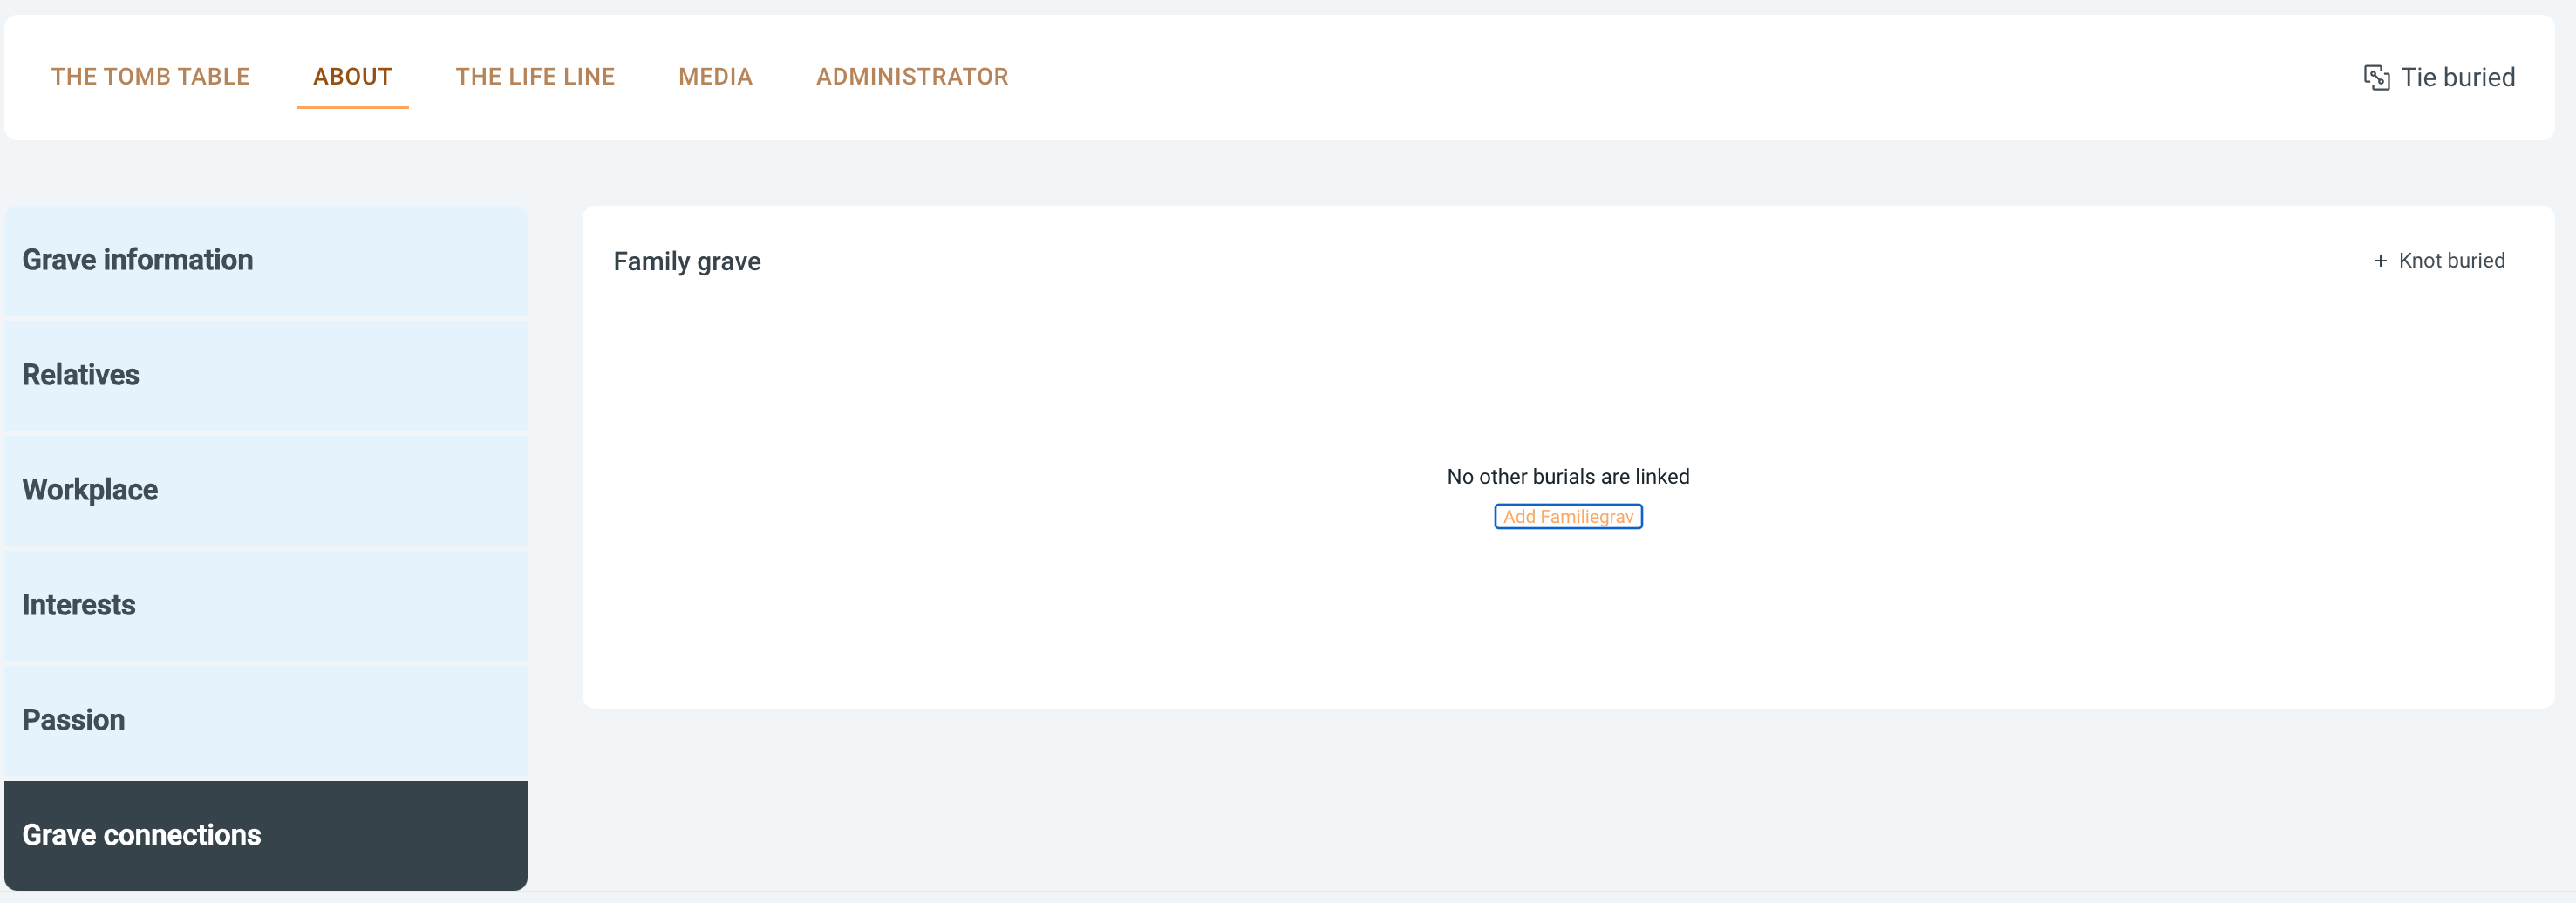
Add Connection: Click on ‘Add Grave Connection’ or a similarly labeled button. This will allow you to search for other deceased individuals within the Nettgrav.no database.
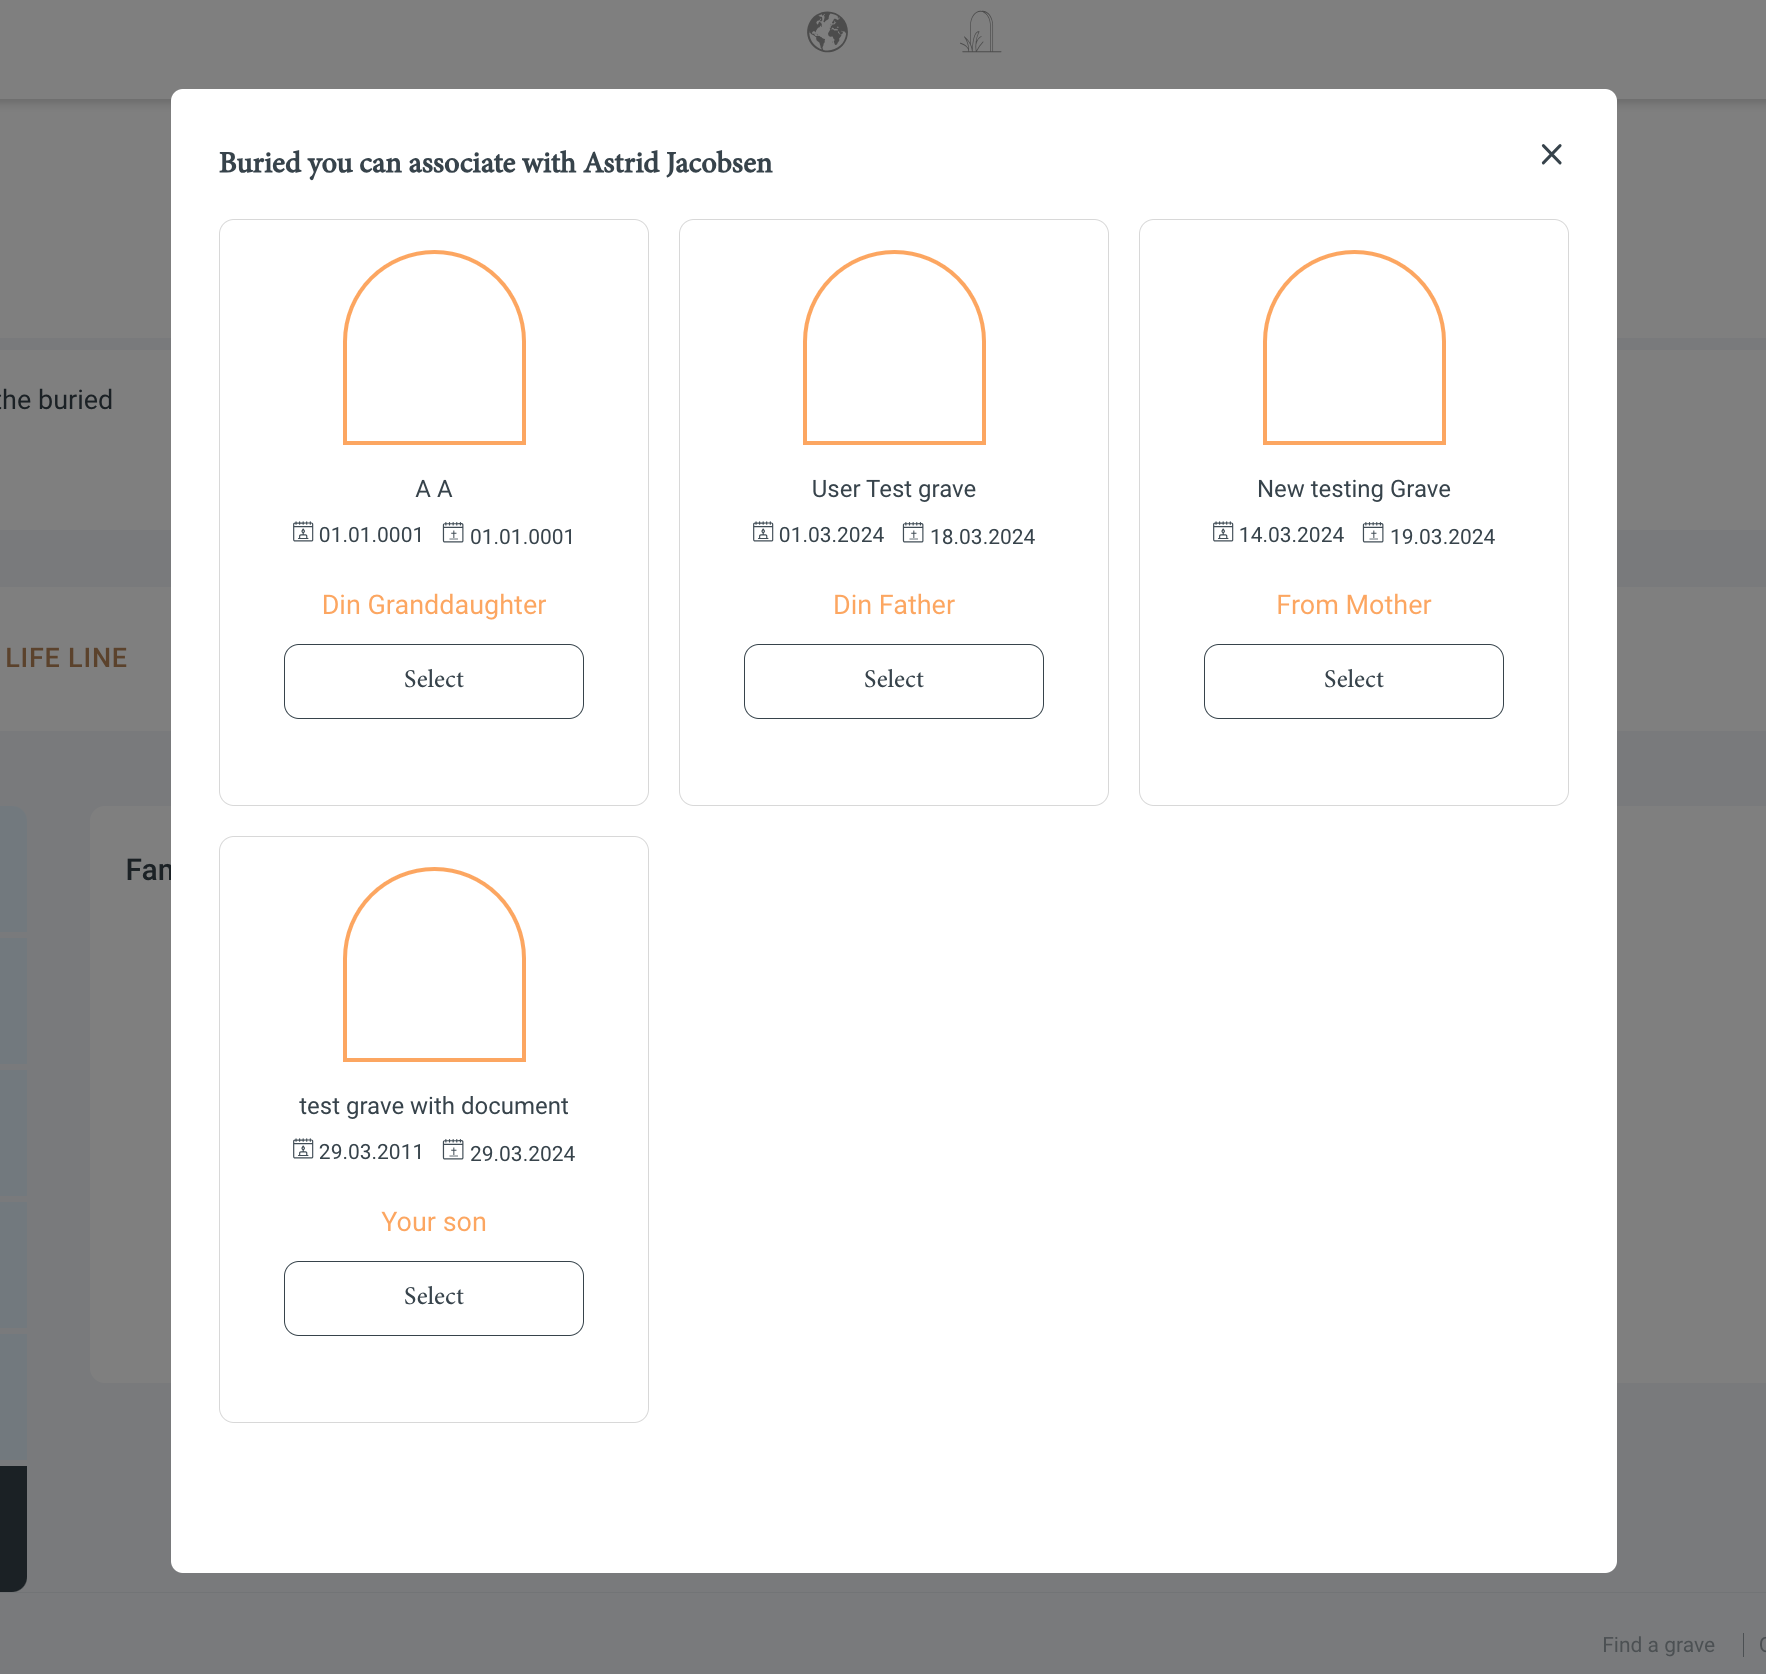
Select Deceased to Link: Choose deceased you would like to link to eachother. Choose between graves you already have administration or guardianship over.
Select the Relationship: Once you find the grave, you will need to specify the relationship that this person had with the deceased in the original grave. Options might include family relations like spouse, parent, sibling, or other significant connections.
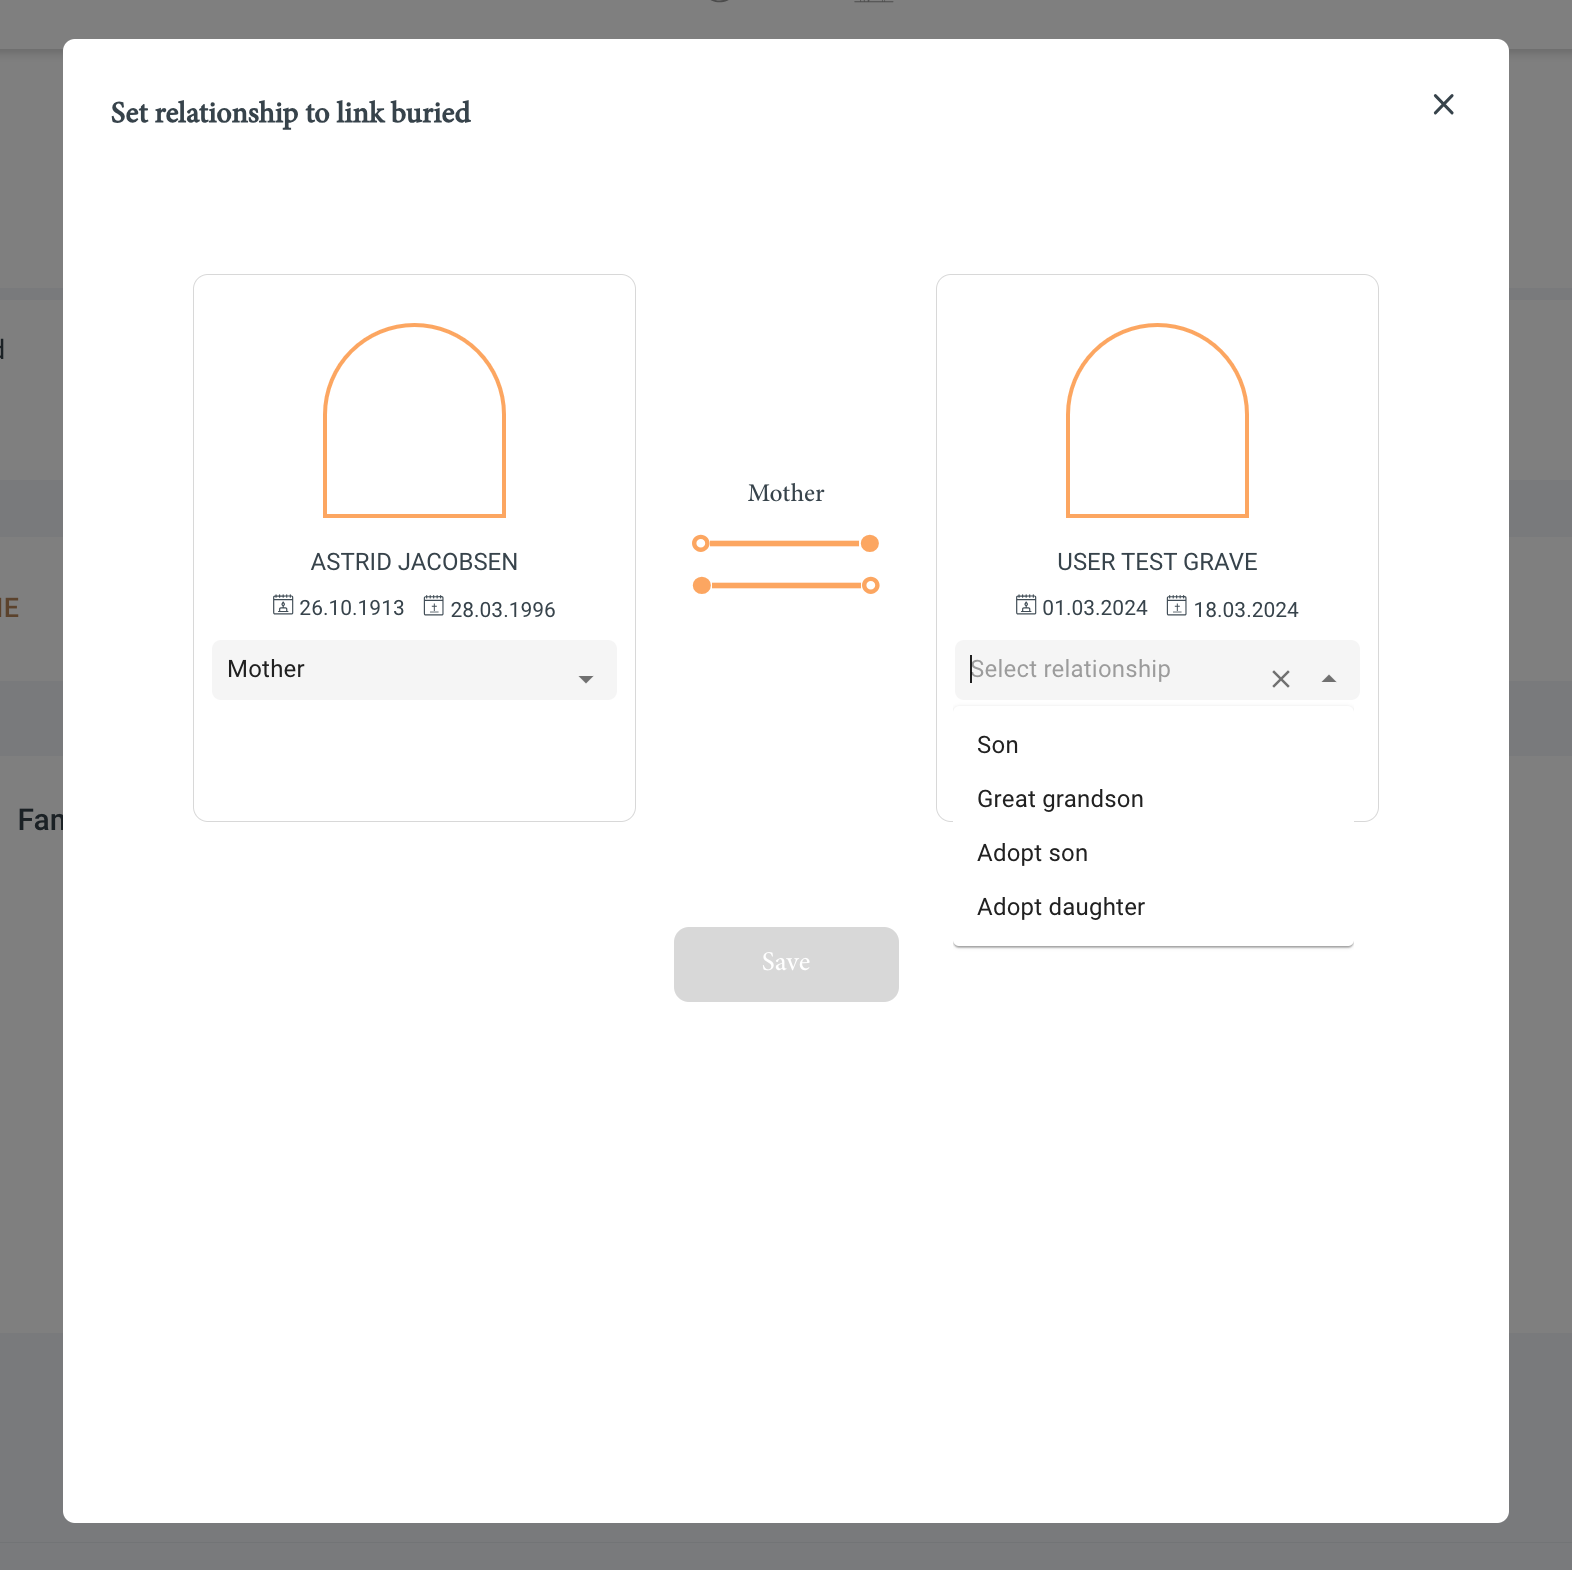
Save the Connection: After selecting the relationship, save the connection. The linked grave will now appear in the original grave’s page, symbolizing the bond shared between the two.
Review and Edit if Necessary: Review the linked graves to ensure that all connections are accurate. You can edit or remove a link if needed by navigating back to the ‘Grave Connections’ section.
Remember to respect the privacy and wishes of other family members when linking graves, as these connections will be visible to anyone who visits the graves. Creating these links is a way to preserve the stories and relationships that define the lives of those who have passed, ensuring that their legacy continues to be remembered by future generations.
Frequently Asked Questions
Q: What if I make a mistake while updating? A: If you enter incorrect information or wish to revert changes, you can undo the changes by editing the fields again.


